Any expert with a SOLUTION ?
I am getting very weird results when reconstructing the scene of an image given the Q matrix and the disparity map. So I googled and apparently there are many others experiencing the same problem. I have tried the solution here http://stackoverflow.com/questions/22418846/reprojectimageto3d-in-opencv but am still unable to geenrate anything decent. I hope someone can assist me on this. Q matrix is given below.
Errors: http://stackoverflow.com/questions/26917890/opencv-pointcloud-from-depth-map?rq=1
Please let me know if you need me to post the entire working code as well as the text file (dataset) with the calibration parameters.
[1, 0, 0, -612.5766;
  0, 1, 0, -175.67438;
  0, 0, 0, 724.63995;
  0, 0, 1.861616, -0]
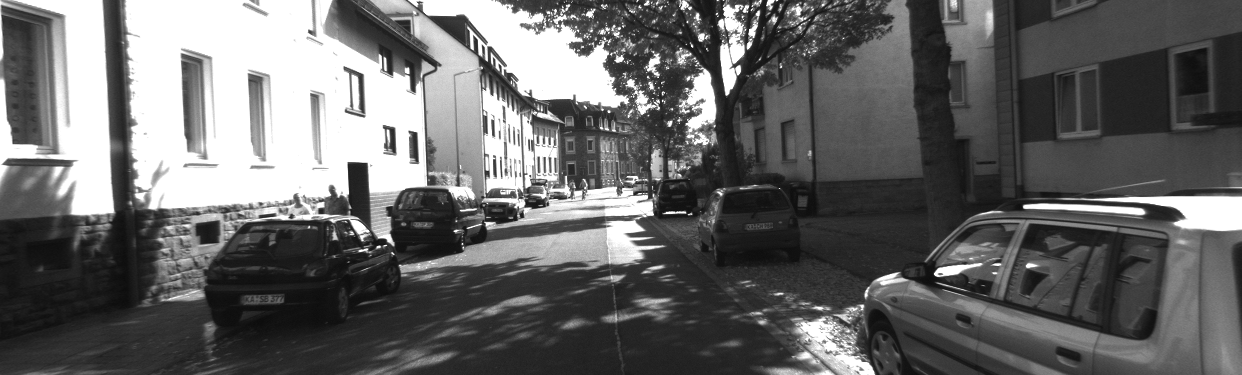
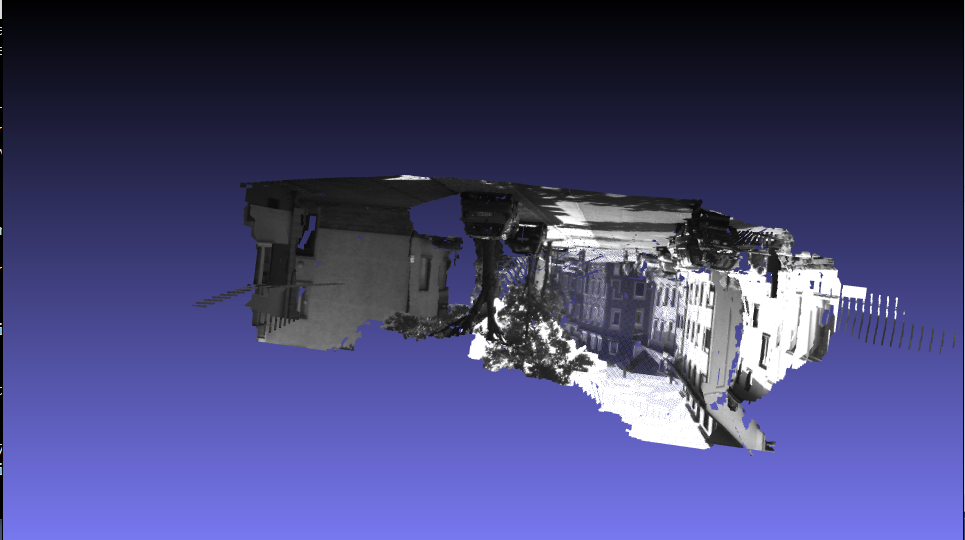
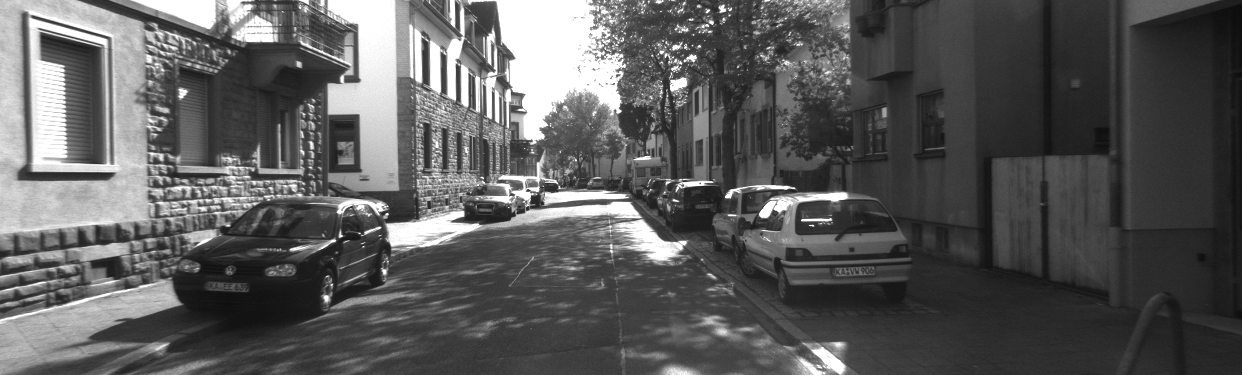
Scene, Disparity Map and the Reconstructed Image produced via viz vtk are all shown below. Part of my code is also below. Disparity map must be divided by 256 as written on the dataset website.


    Mat disparity = imread("2011_09_26_drive_0095//0000000099_left_disparity.png", CV_LOAD_IMAGE_GRAYSCALE);
    Mat image = imread("2011_09_26_drive_0095//image//0000000099.png", CV_LOAD_IMAGE_GRAYSCALE);

    namedWindow("Disparity Map", CV_WINDOW_AUTOSIZE); imshow("Disparity Map", disparity);
    namedWindow("Image", CV_WINDOW_AUTOSIZE); imshow("Image", image);

    disparity.convertTo(disparity, CV_32F);
    disparity = disparity / 256.0;

    //----------------------------------------------------------------------
    // Reconstruct
    //----------------------------------------------------------------------

    cv::Mat XYZ(disparity.size(), CV_32FC3);
    reprojectImageTo3D(disparity, XYZ, Q);

    //----------------------------------------------------------------------
    // Visualize
    //----------------------------------------------------------------------

    /// Create a window
    viz::Viz3d myWindow("Coordinate Frame");

    while (!myWindow.wasStopped())
    {
        /// Create a cloud widget
        viz::WCloud cw(XYZ, viz::Color::red());

        /// Display it in a window
        myWindow.showWidget("CloudWidget1", cw);

        myWindow.spinOnce(1, true);
    }
The edited code based on the solution posted at http://stackoverflow.com/questions/22418846/reprojectimageto3d-in-opencv
    Mat disparity = imread("2011_09_26_drive_0095//0000000099_left_disparity.png", CV_LOAD_IMAGE_GRAYSCALE);
    Mat image = imread("2011_09_26_drive_0095//image//0000000099.png", CV_LOAD_IMAGE_GRAYSCALE);

    namedWindow("Disparity Map", CV_WINDOW_AUTOSIZE); imshow("Disparity Map", disparity);
    namedWindow("Image", CV_WINDOW_AUTOSIZE); imshow("Image", image);

    disparity.convertTo(disparity, CV_32F);
    disparity = disparity / 256.0;

    //----------------------------------------------------------------------
    // Reconstruct
    //----------------------------------------------------------------------


Mat XYZ(disparity.size(), CV_32FC3);
Mat_<float> vec_temp(4, 1);

for (int row = 0; row < disparity.rows; row++)
{
    for (int col = 0; col < disparity.cols; col++)
    {
        vec_temp(0) = col; vec_temp(1) = row; vec_temp(2) = disparity.at<float>(row, col);

        // Discard points with 0 disparity
        if (vec_temp(2) == 0) continue;
        vec_temp(3) = 1;
        vec_temp = Q*vec_temp;
        vec_temp = vec_temp / vec_temp(3);

        Vec3f &point = XYZ.at<Vec3f>(row, col);
        point[0] = vec_temp(0);
        point[1] = vec_temp(1);
        point[2] = vec_temp(2);
    }
}

    //----------------------------------------------------------------------
    // Visualize
    //----------------------------------------------------------------------

    /// Create a window
    viz::Viz3d myWindow("Coordinate Frame");

    while (!myWindow.wasStopped())
    {
        /// Create a cloud widget
        viz::WCloud cw(XYZ, viz::Color::red());

        /// Display it in a window
        myWindow.showWidget("CloudWidget1", cw);

        myWindow.spinOnce(1, true);
    }