I've solved your problem, but the yellow is not very yellow..
import cv2
import numpy as np
import matplotlib.pyplot as plt
from sklearn.cluster import k_means
img = cv2.imread("./grids.png")
gray = cv2.cvtColor(img, cv2.COLOR_BGR2GRAY)
img_hsv = cv2.cvtColor(img, cv2.COLOR_BGR2HSV)
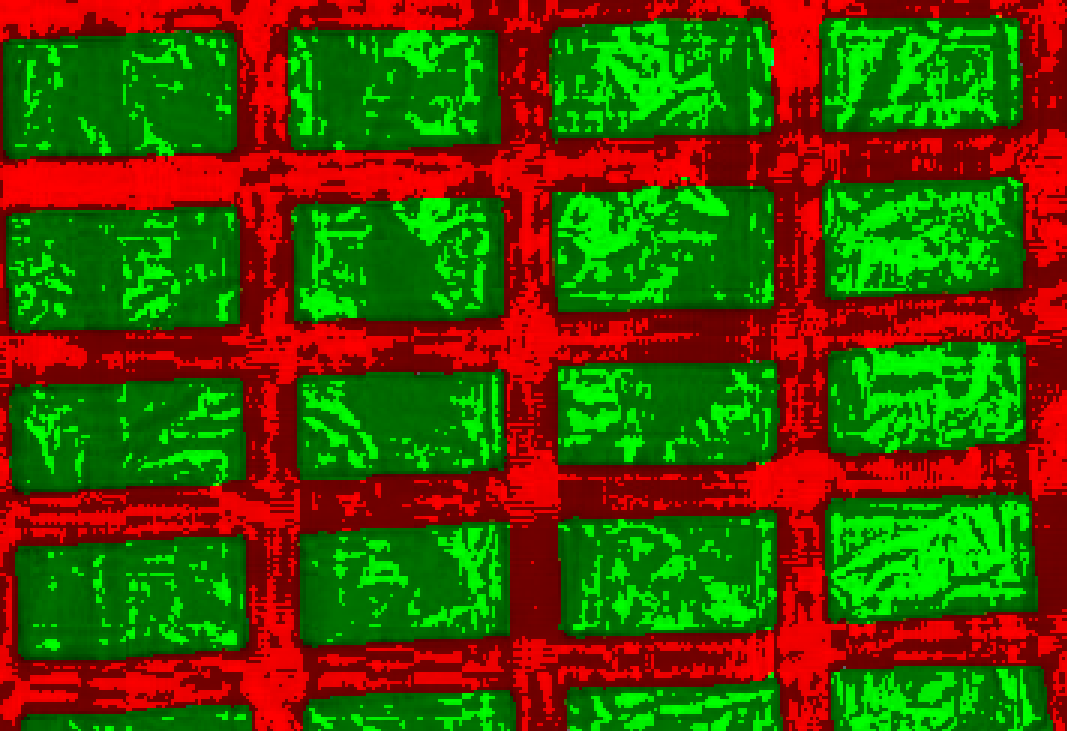
mask = ((img_hsv > np.array([0, 0, 230])).astype(np.float32) + (img_hsv > np.array([0, 0, 230])).astype(np.float32) * (-0.5) + 0.5)
img_partly_darken = cv2.cvtColor(mask * img_hsv, cv2.COLOR_HSV2BGR)
plt.imshow(cv2.cvtColor(img_partly_darken, cv2.COLOR_BGR2RGB))
plt.show()
cv2.imwrite("t.png", img_partly_darken)
# Save the img now, and ... Surprise! You can feel the mystery:
plt.imshow(cv2.cvtColor(cv2.imread("t.png"), cv2.COLOR_BGR2RGB))
plt.show()
# Then, you can just pick out the green ones:
green_mask = img[:, :, 1] > img[:, :, 2] # value of green channel > that of red channel
# Here is a trick, I use color space convertion to boardcast one channel to three channels
green_mask = (green_mask.astype(np.uint8)) * 255
green_mask = cv2.cvtColor(green_mask, cv2.COLOR_GRAY2BGR)
green3_mask = (green_mask > 0).astype(np.uint8) * 255
img_green = cv2.bitwise_and(green3_mask, img)
plt.imshow(cv2.cvtColor(img_green, cv2.COLOR_BGR2RGB))
plt.show()
# Back to the original img's colors:
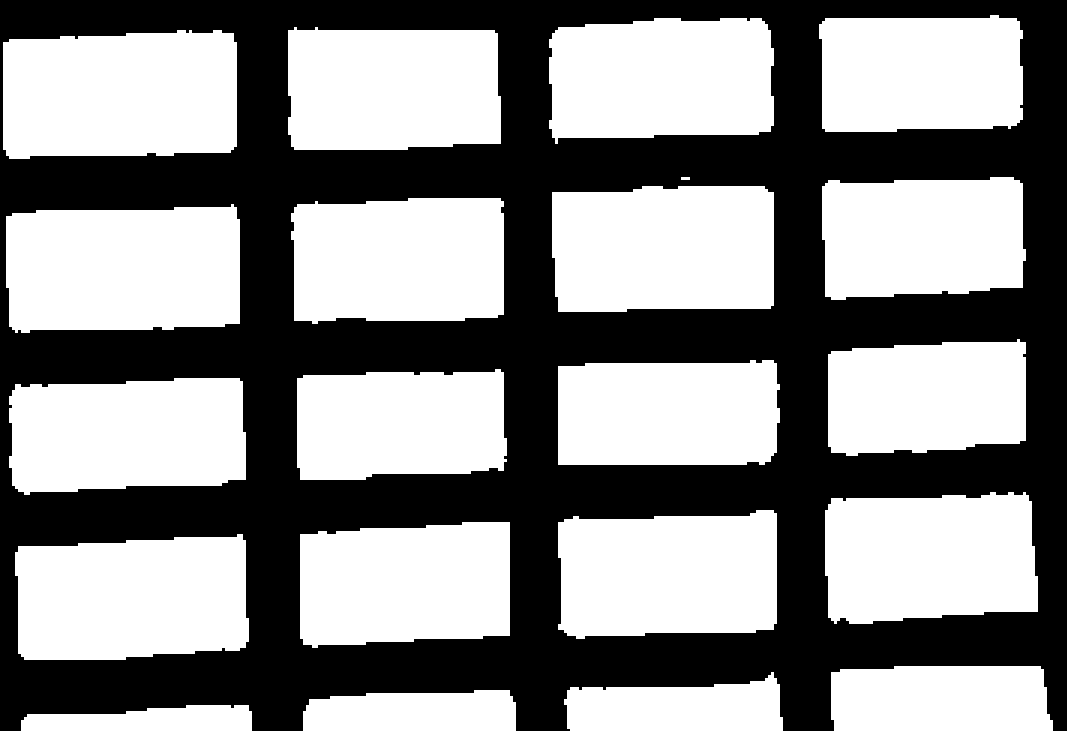
ret, thr = cv2.threshold(cv2.cvtColor(img_green, cv2.COLOR_BGR2GRAY), 10, 255, cv2.THRESH_BINARY)
blue_mask = (cv2.cvtColor(thr, cv2.COLOR_GRAY2BGR) > 0).astype(np.uint8) * 255
kernel_open =cv2.getStructuringElement(cv2.MORPH_RECT, (5, 5))
blue_mask = cv2.morphologyEx(blue_mask, cv2.MORPH_OPEN, kernel_open)
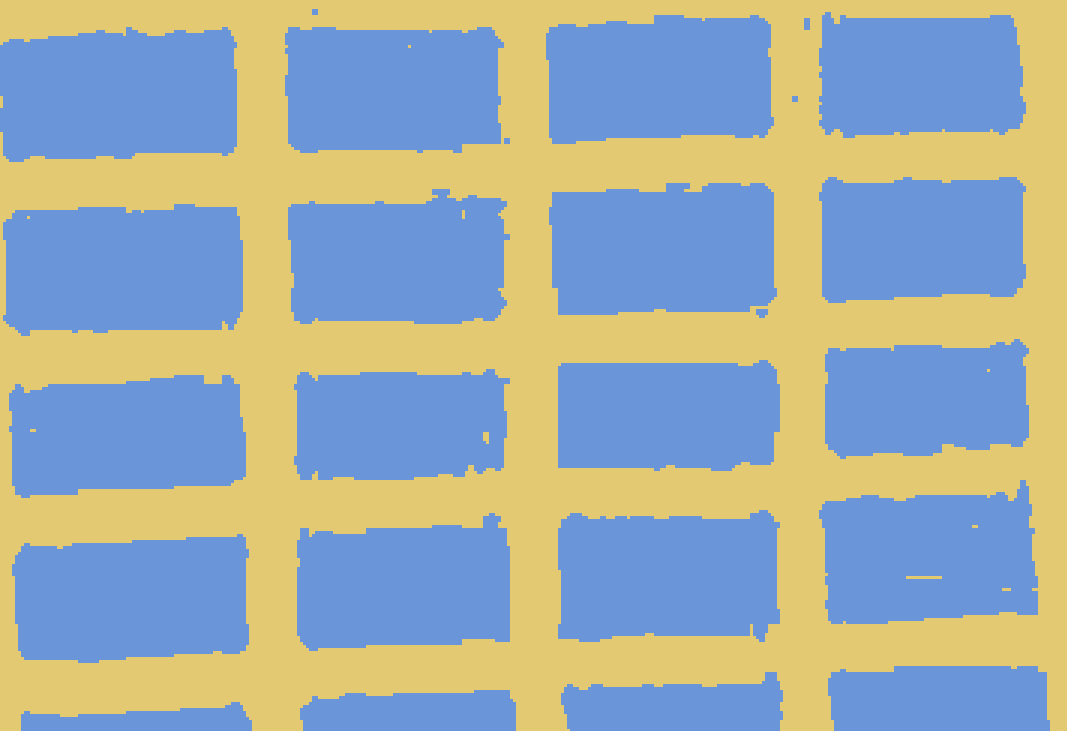
yellow_mask = 255 - blue_mask
# use k-means to get the two main colors -- blue and yellow
pixels = img
pixels = pixels.reshape(pixels.shape[0] * pixels.shape[1], 3)
[centroids, labels, inertia] = k_means(pixels, 2)
centroids = np.array(sorted(centroids.astype(np.uint8).tolist(), key=lambda x: x[0])) # B channel
blue_centroid = centroids[1]
yellow_centroid = centroids[0]
blue_ones = cv2.bitwise_and(blue_mask, centroids[1])
yellow_ones = cv2.bitwise_and(yellow_mask, centroids[0])
plt.imshow(cv2.cvtColor(cv2.add(blue_ones, yellow_ones), cv2.COLOR_BGR2RGB))
plt.show()
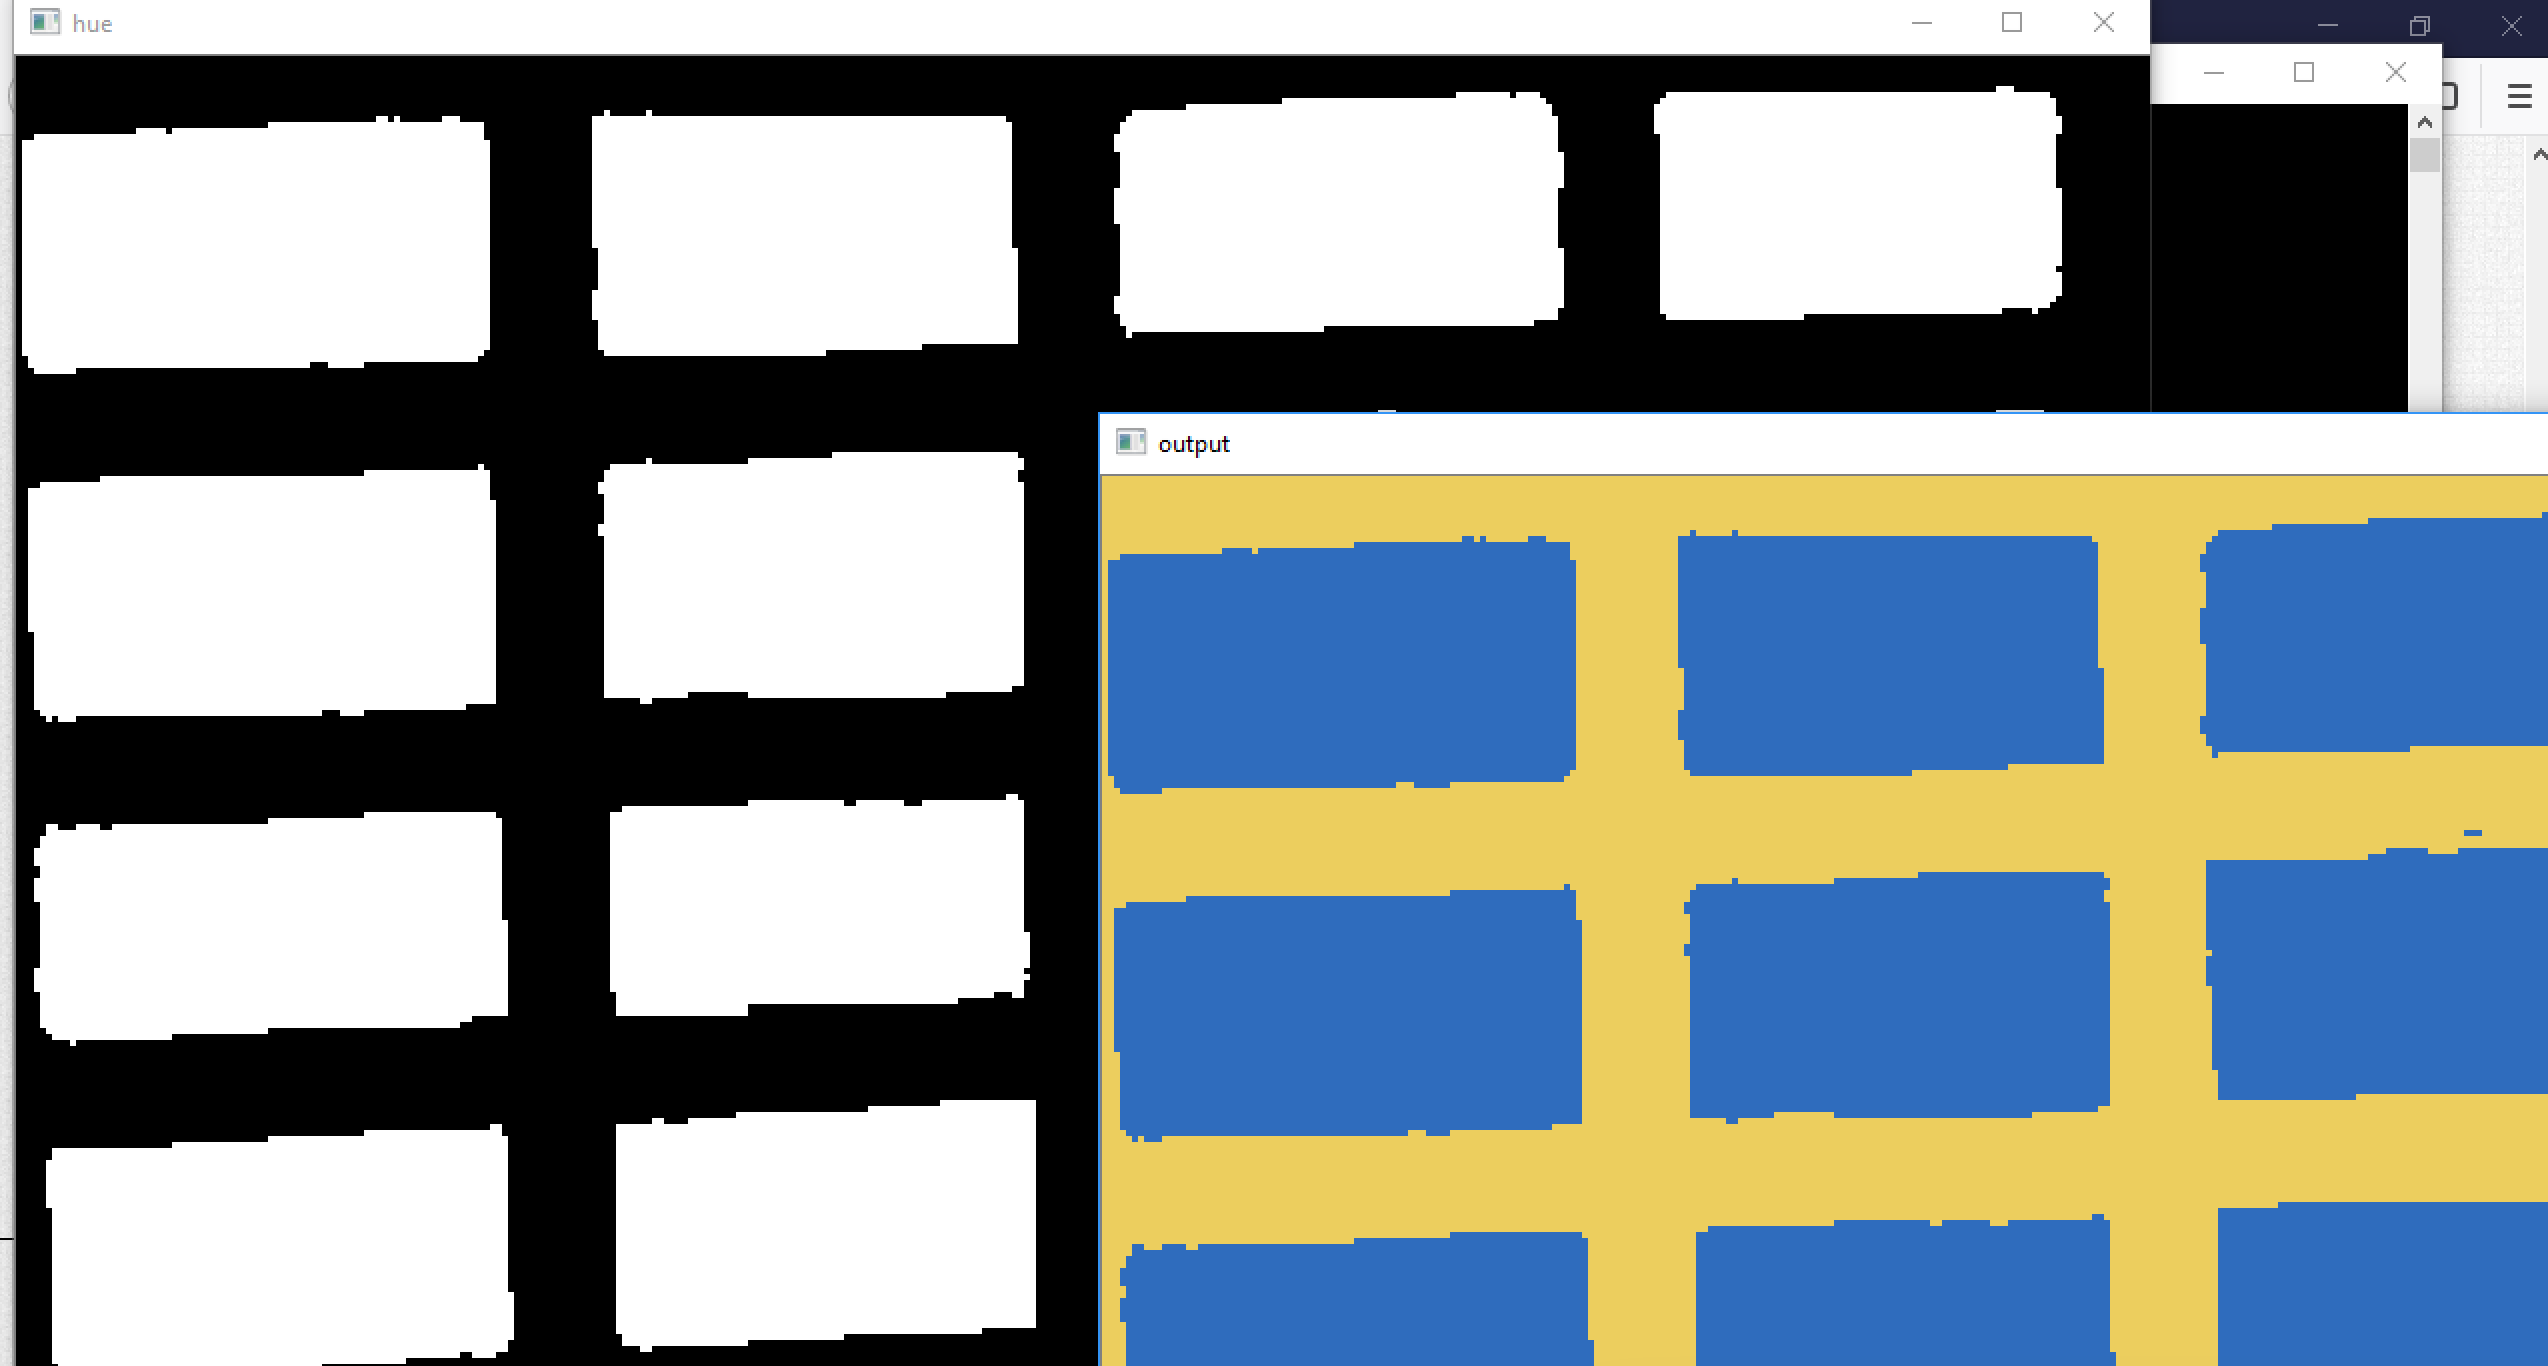
The img_partly_darken

Imread the imwriten:
The blue_mask:
And the final result:
May this can help you:)


" polarizer filter" It's a physical filter before lens. You cannot simulate it using numerical filter
Can you please tell me what you want to do after this process? i.e Do you want to preserve the Surface to be exact same? Or you just want to filter/Segment the Blue regions from the Image?
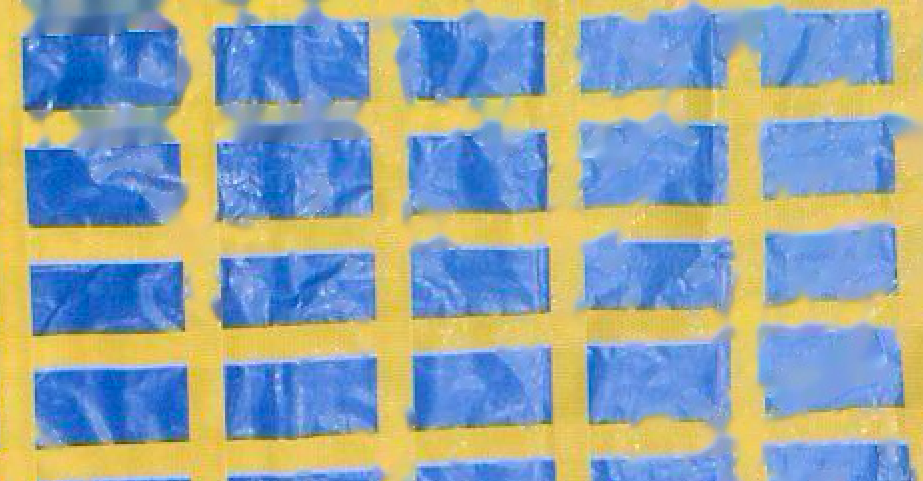
@Balaji R Measuring objects placed on the grid. Since the grid surface is giving away glare edge of the object can't be detected. I want to remove the glare.
@LBerger When converted to HSV the glare pixels seem to have values of more than 90%, how can I use this to remove glare?