This forum is disabled, please visit https://forum.opencv.org
| | 1 | initial version |
Still a work in progress, will signal when it is ready :)
Specific instructions to contribute for Windows 7 & TortoiseGIT
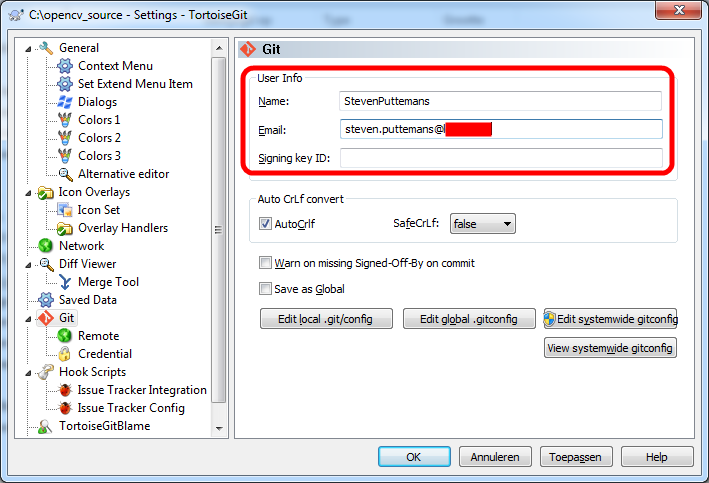
System configuration
Prerequisites
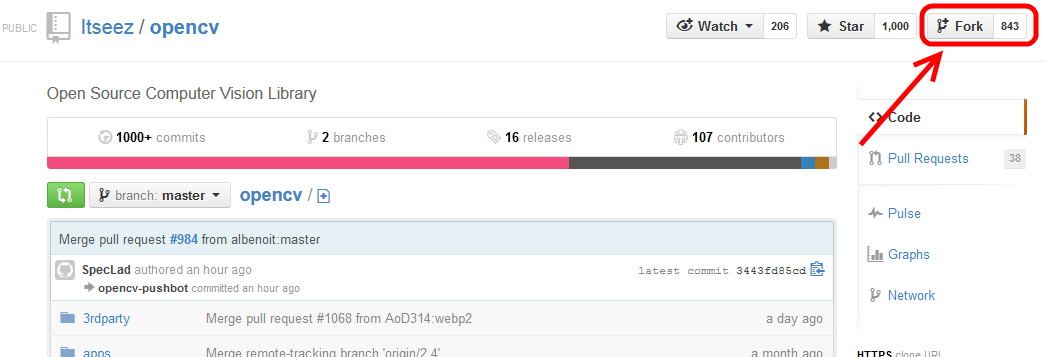
First configure your GitHub page to fork the original openCV repository.
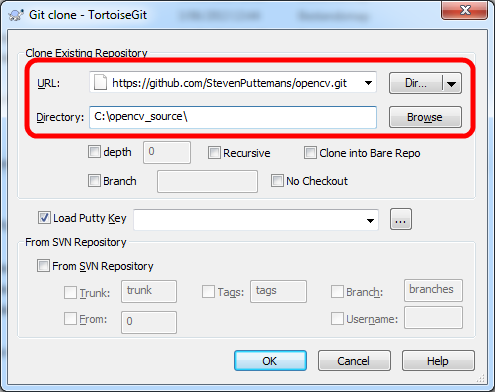
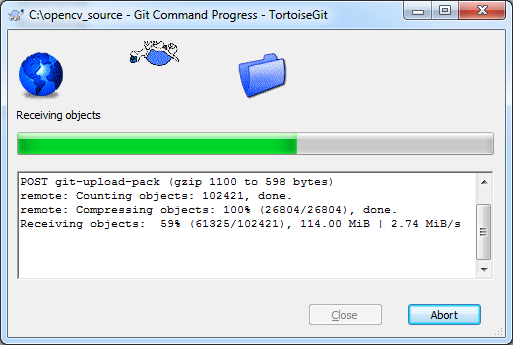
Create a folder on your system to sync up the openCV source code from your fork

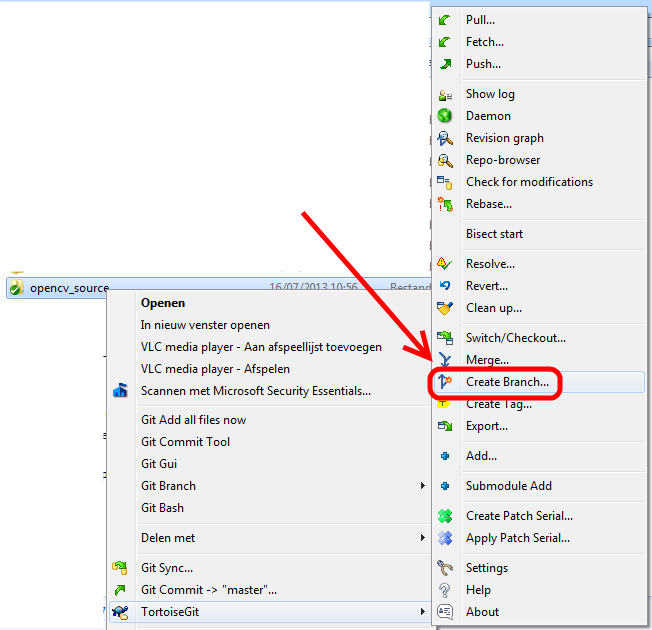
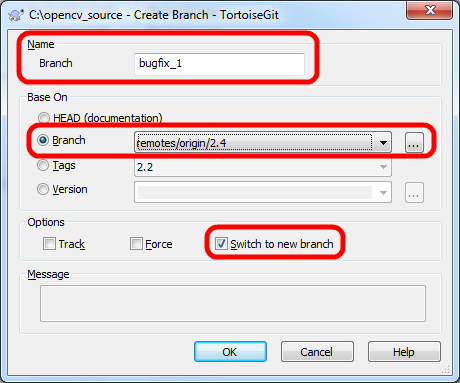
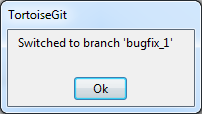
Create a new branch on your Git repository, to apply changes. Do not forget to create a new branch for every single update you want to do!
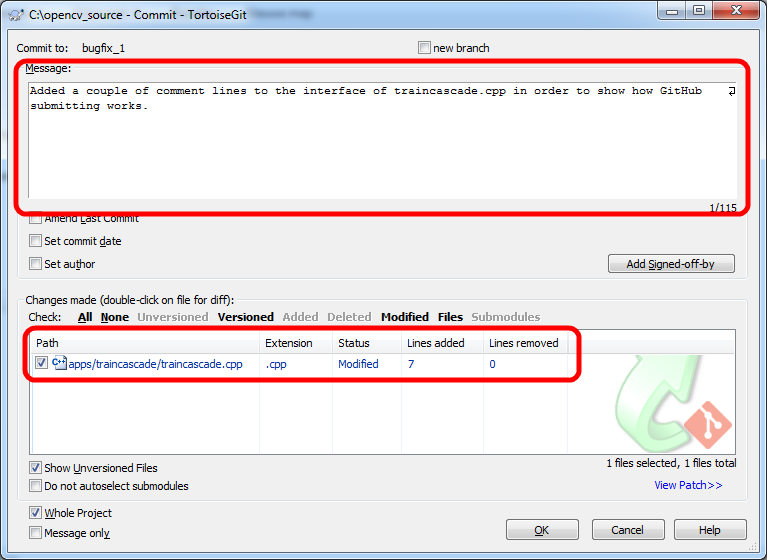
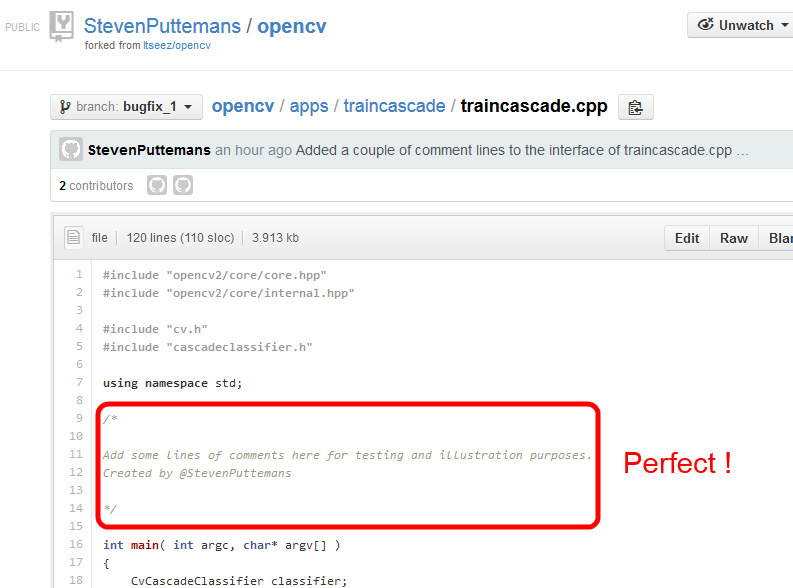
Select the file you want to adapt, in our case I will illustrate adding an extra comment to a source code file.
| | 2 | No.2 Revision |
Still a work in progress, will signal when it is ready :)
Specific instructions to contribute for Windows 7 & TortoiseGIT
System configuration
Prerequisites
First configure your GitHub page to fork the original openCV repository.
Create a folder on your system to sync up the openCV source code from your fork
Create a new branch on your Git repository, to apply changes. Do not forget to create a new branch for every single update you want to do!
Select the file you want to adapt, in (in our case I will illustrate adding an extra comment to a source code file.

| | 3 | No.3 Revision |
Still a work in progress, will signal when it is ready :)
Specific instructions to contribute for Windows 7 & TortoiseGIT
System configuration
Prerequisites
First configure your GitHub page to fork the original openCV repository.
Create a folder on your system to sync up the openCV source code from your fork
Create a new branch on your Git repository, to apply changes. Do not forget to create a new branch for every single update you want to do!
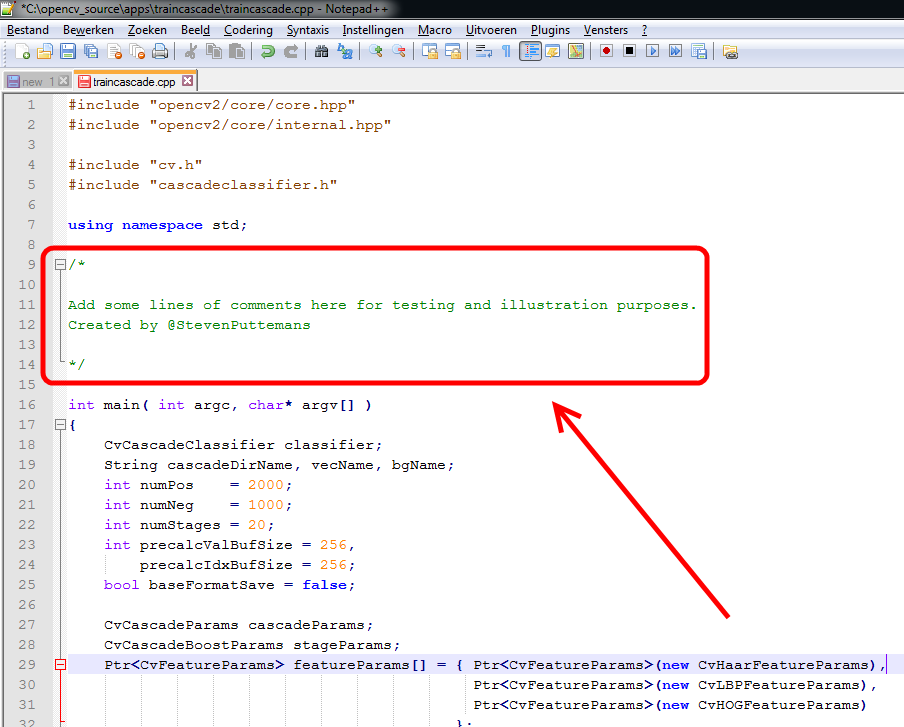
Select the file you want to adapt (in our case I will illustrate adding an extra comment to a source code file), adapt the the file accordingly and commit it to your GitHub repository.
| | 4 | No.4 Revision |
Still a work in progress, will signal when it is ready :)
Specific instructions to contribute for Windows 7 & TortoiseGIT
System configuration
Prerequisites
First configure your GitHub page to fork the original openCV repository.
Create a folder on your system to sync up the openCV source code from your fork
Create a new branch on your Git repository, to apply changes. Do not forget to create a new branch for every single update you want to do!
Select the file you want to adapt (in our case I will illustrate adding an extra comment to a source code file), adapt the the file accordingly and commit it to your GitHub repository.
STUCK HERE

| | 5 | No.5 Revision |
Still a work in progress, will signal when it is ready :)
Specific instructions to contribute for Windows 7 & TortoiseGIT
System configuration
Prerequisites
First configure your GitHub page to fork the original openCV repository.
Create a folder on your system to sync up the openCV source code from your fork
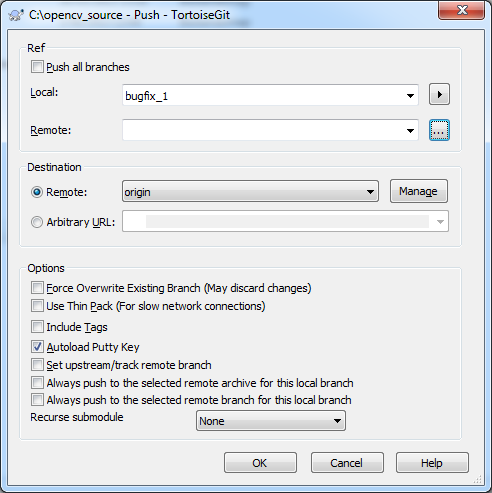
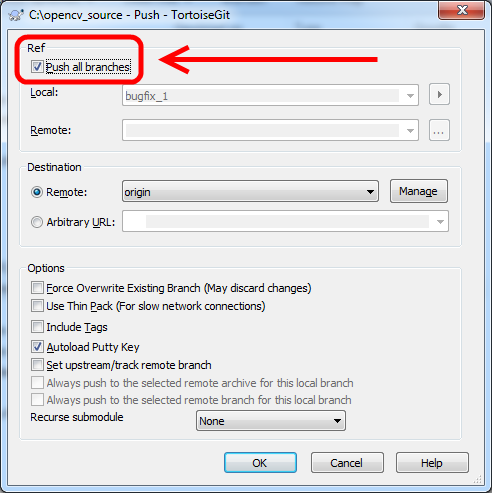
Create a new branch on your Git repository, to apply changes. Do not forget to create a new branch for every single update you want to do!do! These branches are local, but will be pushed to github after editing the source code.
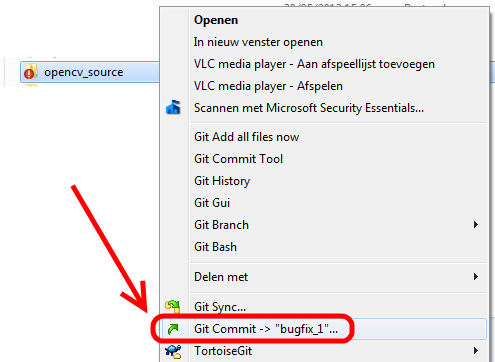
Select the file you want to adapt (in our case I will illustrate adding an extra comment to a source code file), adapt the the file accordingly and commit it to your GitHub repository.
STUCK HERE

| | 6 | No.6 Revision |
Still a work in progress, will signal when it is ready :)
Specific instructions to contribute for Windows 7 & TortoiseGIT
System configuration
Prerequisites
First configure your GitHub page to fork the original openCV repository.
Create a folder on your system to sync up the openCV source code from your fork
Create a new branch on your Git repository, to apply changes. Do not forget to create a new branch for every single update you want to do! These branches are local, but will be pushed to github after editing the source code.
Select the file you want to adapt (in our case I will illustrate adding an extra comment to a source code file), adapt the the file accordingly and commit it to your GitHub repository.
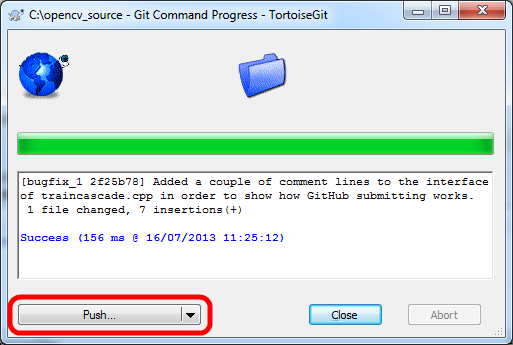
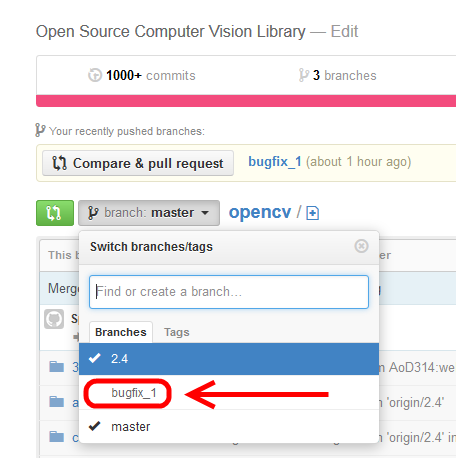
Your system is now all sync'd up with GitHub, lets make sure by checking.
| | 7 | No.7 Revision |
Still a work in progress, will signal when it is ready :)
Specific instructions to contribute for Windows 7 & TortoiseGIT
System configuration
Prerequisites
First configure your GitHub page to fork the original openCV repository.
Create a folder on your system to sync up the openCV source code from your fork
Create a new branch on your Git repository, to apply changes. Do not forget to create a new branch for every single update you want to do! These branches are local, but will be pushed to github after editing the source code.
Select the file you want to adapt (in our case I will illustrate adding an extra comment to a source code file), adapt the the file accordingly and commit it to your GitHub repository.
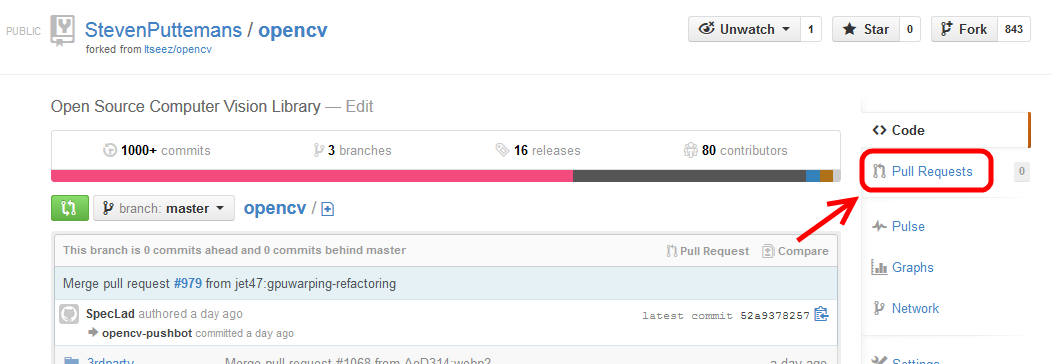
Your system is now all sync'd up with GitHub, lets make sure by checking.
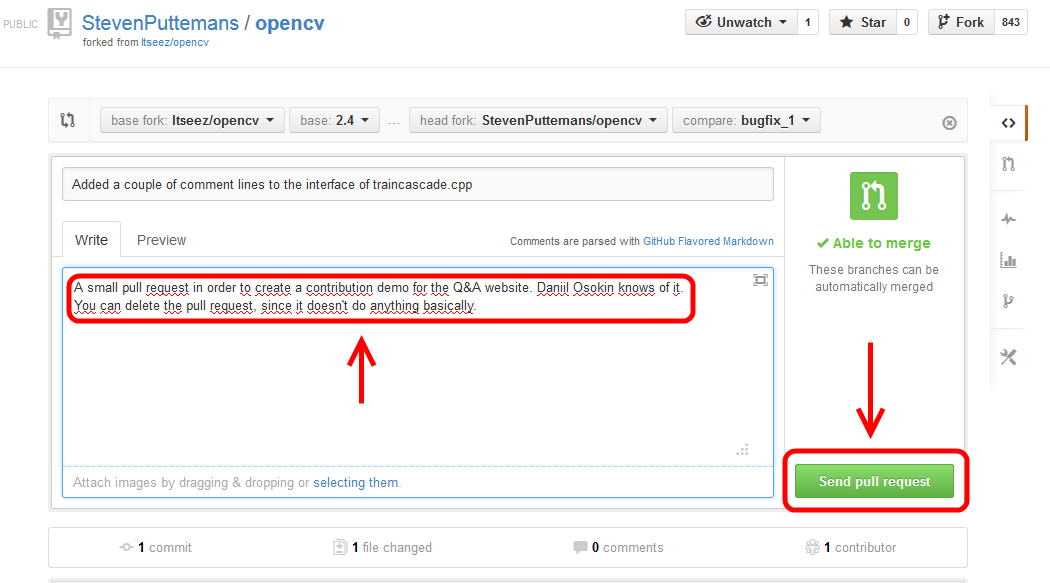
Last step, creating a pull ticket!
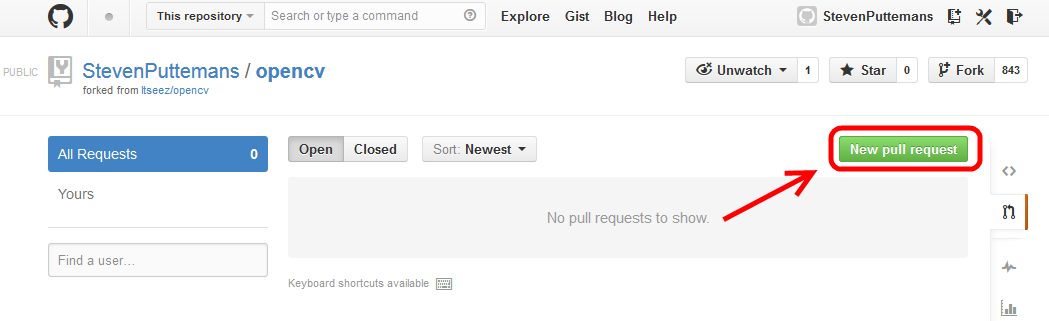
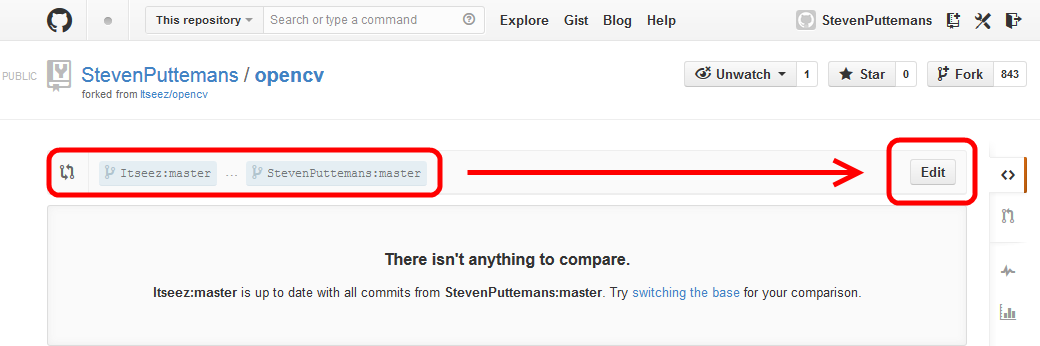
Since we have only a comment to add, we would like to select the 2.4 branch, not the master branch, which is for future functionality mainly, not for small bugfixes.
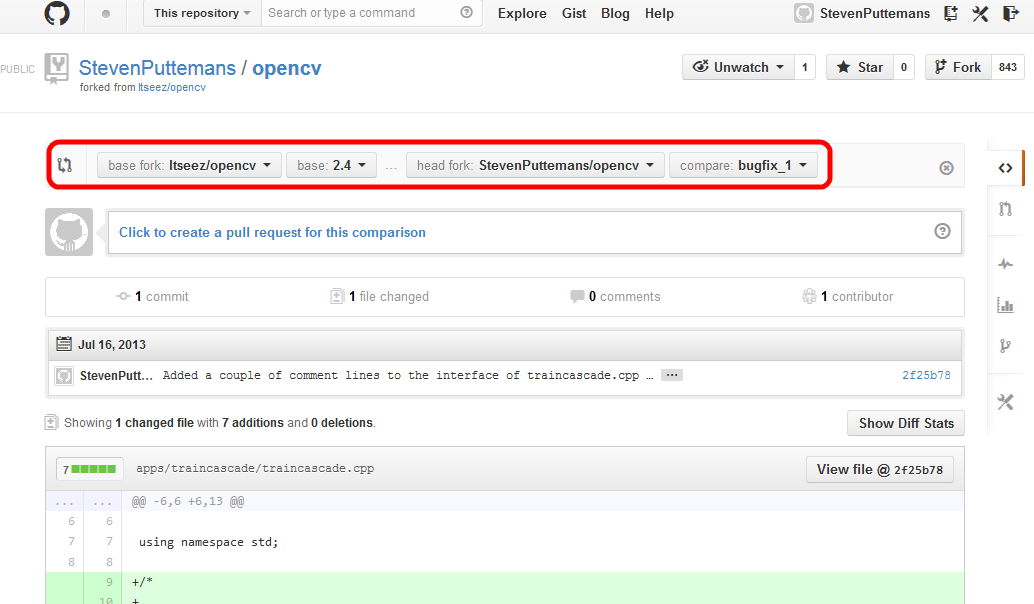
Immediatly we can see that there is a single file found which is different between the current 2.4 branch on Itseez/opencv and the bugfix_1 branch on StevenPuttemans/opencv. We now assign a pull request at this change (which is basically asking to upload your code to the sourcecode of openCV).
Click to create a pull request at the designated button (see previous image).
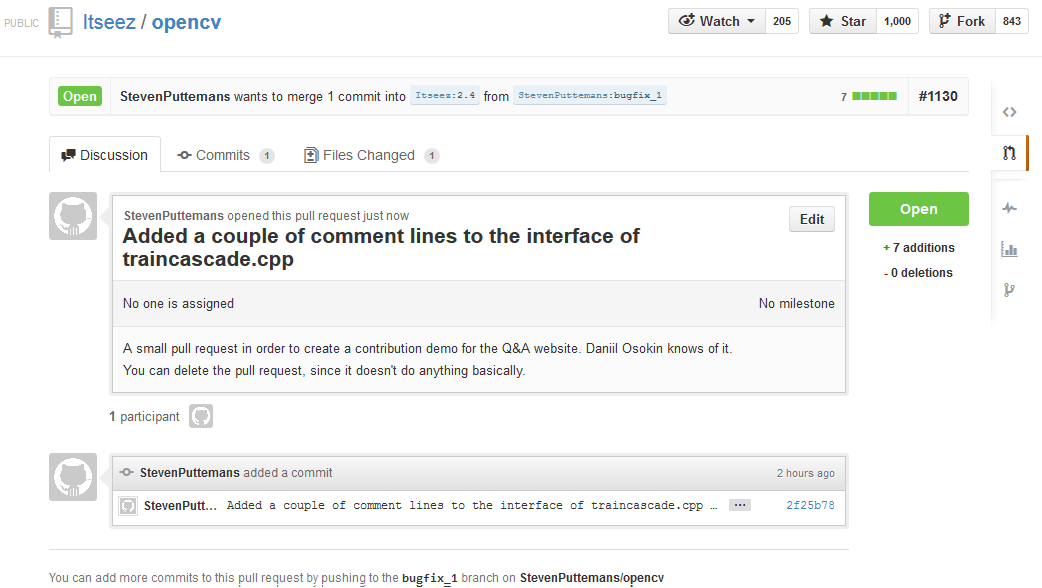
This all will result in an actual pull request being pushed towards the source code manager. Now wait and go check from time to time, to make sure the developpers don't ask you to change something drastically.
| | 8 | No.8 Revision |
Still a work in progress, will signal when it is ready :)
Specific instructions to contribute for Windows 7 & TortoiseGIT
System configuration
Prerequisites
First configure your GitHub page to fork the original openCV repository.
Create a folder on your system to sync up the openCV source code from your fork
Create a new branch on your Git repository, to apply changes. Do not forget to create a new branch for every single update you want to do! These branches are local, but will be pushed to github after editing the source code.
Select the file you want to adapt (in our case I will illustrate adding an extra comment to a source code file), adapt the the file accordingly and commit it to your GitHub repository.
Your system is now all sync'd up with GitHub, lets make sure by checking.
Last step, creating a pull ticket!
Since we have only a comment to add, we would like to select the 2.4 branch, not the master branch, which is for future functionality mainly, not for small bugfixes.
Immediatly we can see that there is a single file found which is different between the current 2.4 branch on Itseez/opencv and the bugfix_1 branch on StevenPuttemans/opencv. We now assign a pull request at this change (which is basically asking to upload your code to the sourcecode of openCV).
Click to create a pull request at the designated button (see previous image).
This *This all will result in an actual pull request being pushed towards the source code manager. manager. Now wait and go check from time to time, to make sure the developpers don't ask you to change something drastically.
A last step you should consider is going back to the developer pages and couple the link to your pull request at the actual bugfix. As far as I know, the bug will then be automatically closed once your pull request has been merged.
ACKNOWLEDGEMENTS
Guide was created by @StevenPuttemans Guidance was given by @berak and @Daniil Osokin
| | 9 | No.9 Revision |
Specific instructions to contribute for Windows 7 & TortoiseGIT
System configuration
Prerequisites
First configure your GitHub page to fork the original openCV repository.
Create a folder on your system to sync up the openCV source code from your fork
Create a new branch on your Git repository, to apply changes. Do not forget to create a new branch for every single update you want to do! These branches are local, but will be pushed to github after editing the source code.
Select the file you want to adapt (in our case I will illustrate adding an extra comment to a source code file), adapt the the file accordingly and commit it to your GitHub repository.
Your system is now all sync'd up with GitHub, lets make sure by checking.
Last step, creating a pull ticket!
Since we have only a comment to add, we would like to select the 2.4 branch, not the master branch, which is for future functionality mainly, not for small bugfixes.
Immediatly we can see that there is a single file found which is different between the current 2.4 branch on Itseez/opencv and the bugfix_1 branch on StevenPuttemans/opencv. We now assign a pull request at this change (which is basically asking to upload your code to the sourcecode of openCV).
Click to create a pull request at the designated button (see previous image).
*This all will result in an actual pull request being pushed towards the source code manager. Now wait and go check from time to time, to make sure the developpers don't ask you to change something drastically. *
A last step you should consider is going back to the developer pages and couple the link to your pull request at the actual bugfix. As far as I know, the bug will then be automatically closed once your pull request has been merged.
ACKNOWLEDGEMENTS
Guide was created by @StevenPuttemans
@StevenPuttemans
Guidance was given by @berak and @Daniil Osokin
