This forum is disabled, please visit https://forum.opencv.org
| 2019-10-31 04:24:22 -0600 | received badge | ● Popular Question (source) |
| 2019-10-20 18:07:33 -0600 | received badge | ● Notable Question (source) |
| 2019-07-31 05:22:10 -0600 | received badge | ● Famous Question (source) |
| 2019-01-06 23:11:21 -0600 | received badge | ● Popular Question (source) |
| 2018-01-21 08:34:05 -0600 | received badge | ● Notable Question (source) |
| 2017-10-22 11:53:29 -0600 | received badge | ● Popular Question (source) |
| 2016-12-07 12:31:23 -0600 | received badge | ● Student (source) |
| 2016-09-29 06:08:22 -0600 | commented answer | What is the correct way of using the cv2.correctMatches in Python Didn't I just say the exact same thing.......... |
| 2016-09-29 02:21:15 -0600 | commented question | Can not compile: Found OpenCV Windows Pack but it has no binaries compatible, BUT I use linux Do you mean, I can delete the release folder that I made? OR Can I downlaod the opencv folder as well? |
| 2016-09-29 02:18:20 -0600 | commented question | Can not compile: Found OpenCV Windows Pack but it has no binaries compatible, BUT I use linux @berak It already worked now, Can you please help to explain:
|
| 2016-09-29 02:06:15 -0600 | commented question | Can not compile: Found OpenCV Windows Pack but it has no binaries compatible, BUT I use linux @berak I don't understan what "this" "it" refers to in you sentence |
| 2016-09-29 02:04:27 -0600 | commented question | Can not compile: Found OpenCV Windows Pack but it has no binaries compatible, BUT I use linux @berak so you're saying that I can erase the opencv folder in my HOME directory? |
| 2016-09-29 01:38:18 -0600 | commented question | Can not compile: Found OpenCV Windows Pack but it has no binaries compatible, BUT I use linux @berak In the installation insturction page, it says "Create a temporary directory which we denote as <cmake_binary_dir> (let's say release), where you want to put the generated Makefiles, project files as well the object files and output binaries." I create it inside the folder that I cloned? Later when I make my own project/ code, do I put it inside the release folder?? |
| 2016-09-29 01:22:50 -0600 | commented question | Can not compile: Found OpenCV Windows Pack but it has no binaries compatible, BUT I use linux @berak I already followed the installation tutorial for Linux. I thought it did it |
| 2016-09-29 01:21:05 -0600 | commented question | Can not compile: Found OpenCV Windows Pack but it has no binaries compatible, BUT I use linux @berak Can you suggest which instruction should I follow to build opencv libs and install opencv? |
| 2016-09-29 01:18:05 -0600 | commented question | Can not compile: Found OpenCV Windows Pack but it has no binaries compatible, BUT I use linux During the installation. I did ^ This one i put it into path to my release folder because I don't know where to set to, and according to OpenCV by example book, it is so. Should I set it to /usr/local instead? During the displayimage.cpp tutorial , I did I just followed the tutorial @berak |
| 2016-09-29 01:15:03 -0600 | commented question | Can not compile: Found OpenCV Windows Pack but it has no binaries compatible, BUT I use linux Hi @berak , do you mean during installation tutorial OR during the displayimage.cpp tutorial? |
| 2016-09-29 01:10:31 -0600 | commented question | g++ error: undefined reference to CommandLineParser |
| 2016-09-29 01:08:18 -0600 | received badge | ● Organizer (source) |
| 2016-09-29 01:06:47 -0600 | asked a question | Can not compile: Found OpenCV Windows Pack but it has no binaries compatible, BUT I use linux I'm new to opencv. I followed the installation instruction for LINUX . I chose to install from the page on SourceForge. (SO NOW I have opencv-3.1.0 in my HOME directory) I continued all the steps in the instruction. When executing cmake I put CMAKE_INSTALL_PREFIX= the directory of my "release" folder. Then I moved on to the next tutorial on "Using OpenCV with gcc and cmake" BUT when CMake Warning at /home/osboxes/opencv-3.1.0/cmake/OpenCVConfig.cmake:166 (message):
|
| 2016-09-27 01:57:12 -0600 | asked a question | g++ error: undefined reference to CommandLineParser I am new to opencv, and learning from "opencv by example" book. I finished the installation and wanted to run an example : opencv_version.cpp as suggested. In the book it said I need to run this: but afterward I got error saying that pkg-config ... is not found. After googling, apparently the problem is , I should use ` insetad of ' SO then I ran Yes It started compiling , but I got the following error: which in short is undefined reference to commandlineparser. Here is some snapshot of the source code:
----------EDIT I found out the -ggdb part already : Options starting with -g, -f, -m, -O, -W, or --param are automatically passed on to the various sub-processes invoked by g++. So It meant to used gdb: which is a debugger |
| 2016-09-24 01:44:02 -0600 | received badge | ● Enthusiast |
| 2016-09-23 01:07:26 -0600 | commented answer | character recognition @BenNG I edited my answer. I believe it is clear now |
| 2016-09-22 04:16:58 -0600 | received badge | ● Scholar (source) |
| 2016-09-21 03:36:10 -0600 | received badge | ● Critic (source) |
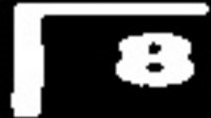
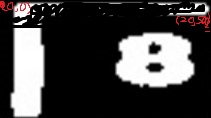
| 2016-09-21 02:47:08 -0600 | answered a question | character recognition Maybe you can manually set the region on the corner& border in the resulting image to black. e.g. image[0:r, 0:w] = 0 Do it 4 times: for upper ,lower, right, and left borders. That way, you kind of eliminate things at the border, and focus on the middle. EDIT : Set the region to black = Turn the pixels to black..... using image[0:r, 0:w] = 0 The setting region depends on the size of your picture. e.g. your picture has 300 rows and 500 columns. Now , you want to eliminate the upper border. e.g. It will set all pixels from (row 0 to row 20, and col 0 to col 500 into black) -> which is the upper border to black, hence "eliminates" the upper border. Note that the 20 is again depend on your picture's size, till where you want to eliminate. Be careful on this number, so that you do not eliminate the number too.
Do this for the left, right, bottom border too! And at the end , you will have eliminate all the white colors except the number itself. |
| 2016-09-21 02:34:33 -0600 | answered a question | What is the correct way of using the cv2.correctMatches in Python Please refer to this documentation Let me quote from it: I thnk the cause of the error is pretty clear "The point-matrices must have one row, and an equal number of columns in function cvCorrectMatches" Can you check/print the size of good_old and good_new? they both must have each one row, and equal number of cols to be passed to correctmatches |
| 2016-09-21 00:07:20 -0600 | commented answer | Understanding bitwise_and operation So let's say for bitwise operation between 2 RGB images. We do the operation on 3 channels, red with red, g with g ,b with b. For every channel, e.g. red, let's say we have 130 and 120 , then we convert 130 ,120 into binary, and do bitwise_and operation on the two binary numbers resulting to a binary number. We convert back into decimal, resulting to the R value of the final image. Is that right? |
| 2016-09-20 20:23:27 -0600 | commented answer | Understanding bitwise_and operation Lastly I don't understand the piece of code you wrote. "bitwise_not(mask, mask);"-> what is it for? and it's not saved to any variable or used later as well... Please help to clarify. Thank you |
| 2016-09-20 20:21:41 -0600 | commented answer | Understanding bitwise_and operation Hi, thanks for the answer. But I don't rlly understand your answer. "They are doing something strange" -> which one? "do use one of the inputs as binary"-> you mean normally one of the input in bitwise_and operation is binary, what about the other input? " For an RGB image, your binary image would be 3 channels, with 255 being ON, and 0 being OFF" -> what about the number between 0 and 255 ? "Perhaps make all the values even by doing a binary_and on a value with only the last bit unset" -> i don't understand this "Where the mask is empty, the result in the output is unchanged from what is THERE before" -> there is referring to what? source1, source2 , or what? cause masked is a new variable that we're going to fill with the result of the operation. |
| 2016-09-20 20:09:19 -0600 | commented answer | how do I fix OpenCV importing errors? Can you copy the error message and your code? |
| 2016-09-20 09:52:17 -0600 | edited question | Understanding bitwise_and operation Hi all, I'm new to openCV. I'm a bit confused about bitwise operation. Appreciate if you can help me to clarify some things.
What I understand is that : the result is equal to src1 & src2 , if the mask for that element is not zero. My question is that if mask for that element is zero, what is result equal to? is it equal to the element in src1 or src2? ----. Lastly, please help me to understand the following code from ROS [0] This line is just to convertimage from ROS image format to openCV image format. Shortly image is a RGB image. [1] convert image form RGB to HSV [2] set the lower limit for yellow color [3] set the upper limit for yellow color [4] producing a binary image : the element that is in the range of lower_yellow and upper_yellow gives 1, and the rest give 0. So mask is a binary image, with the section that qualify as yelloq =1 , and 0 for the rest. [5] I don't really understand this part. We do bitwise_and operation on image & with itself? What for? Also, image is RGB ,not binary, how to operate AND on RGB? Please explain Thanks |
| 2016-09-20 09:46:24 -0600 | commented answer | how do I fix OpenCV importing errors? Try to delete or comment the applicationId in the defaultConfig |
| 2016-09-20 03:04:38 -0600 | received badge | ● Editor (source) |