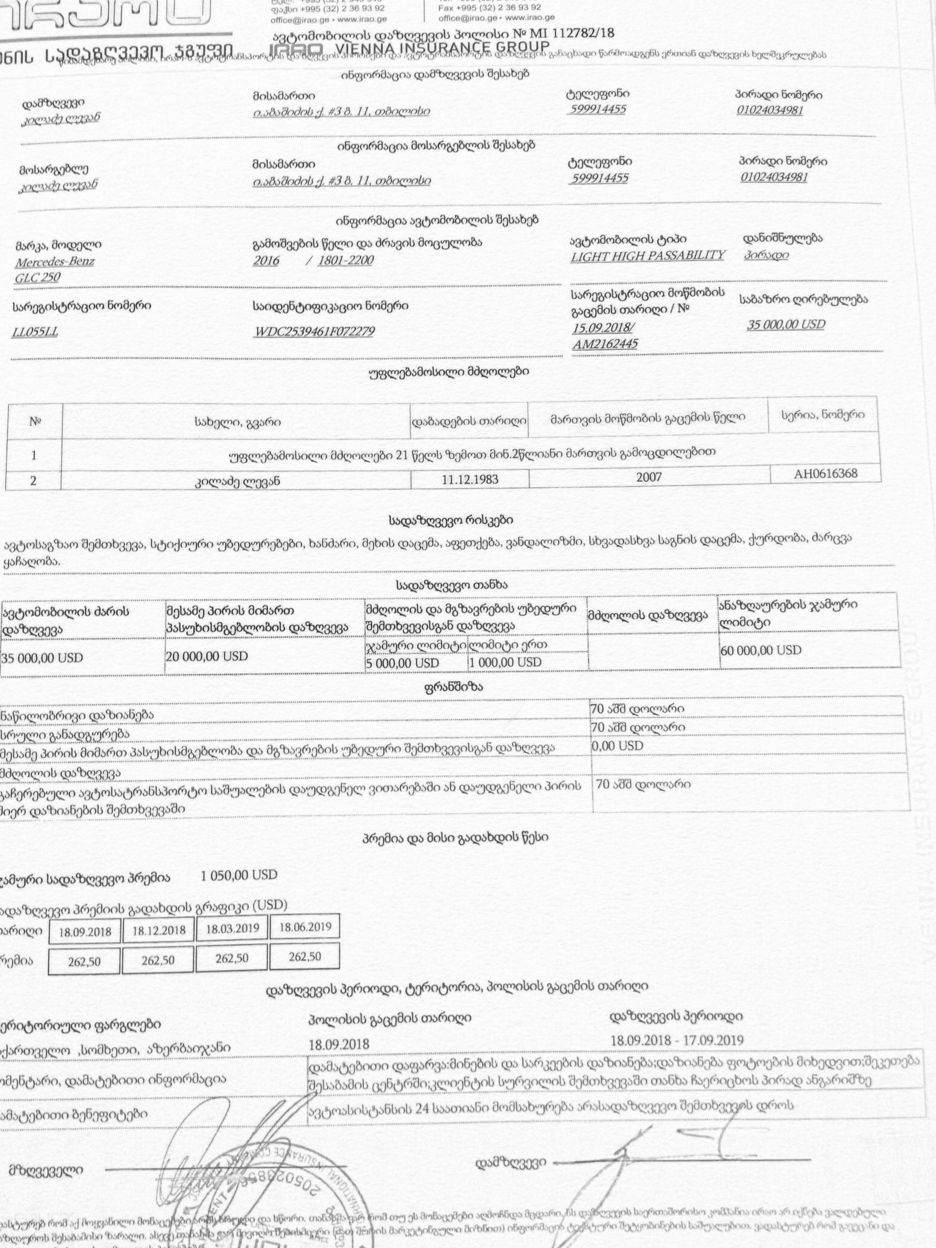
Hey, My goal is to create scanner-like effect. I have image taken by the phone and my result should be make it look like it was scanned. My problem is that my code doesn't work on pictures, or big bold text. You can see that from the text/logo at the upper left corner of the original picture, only it's borders were left in the final result. I want it to be filled. How can I achieve that?
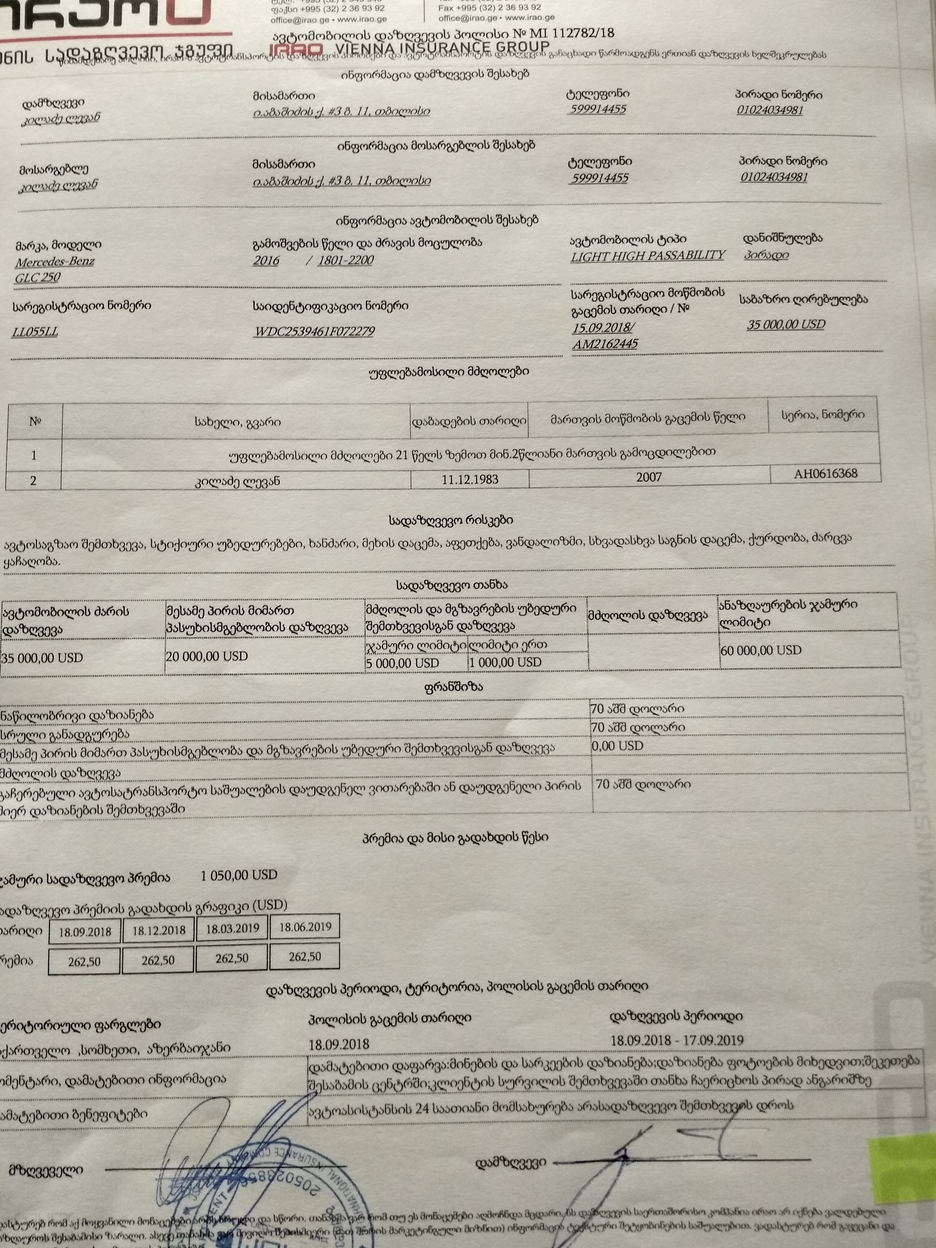
This is my original photo

dilated_img = cv2.dilate(img, np.ones((7, 7), np.uint8))
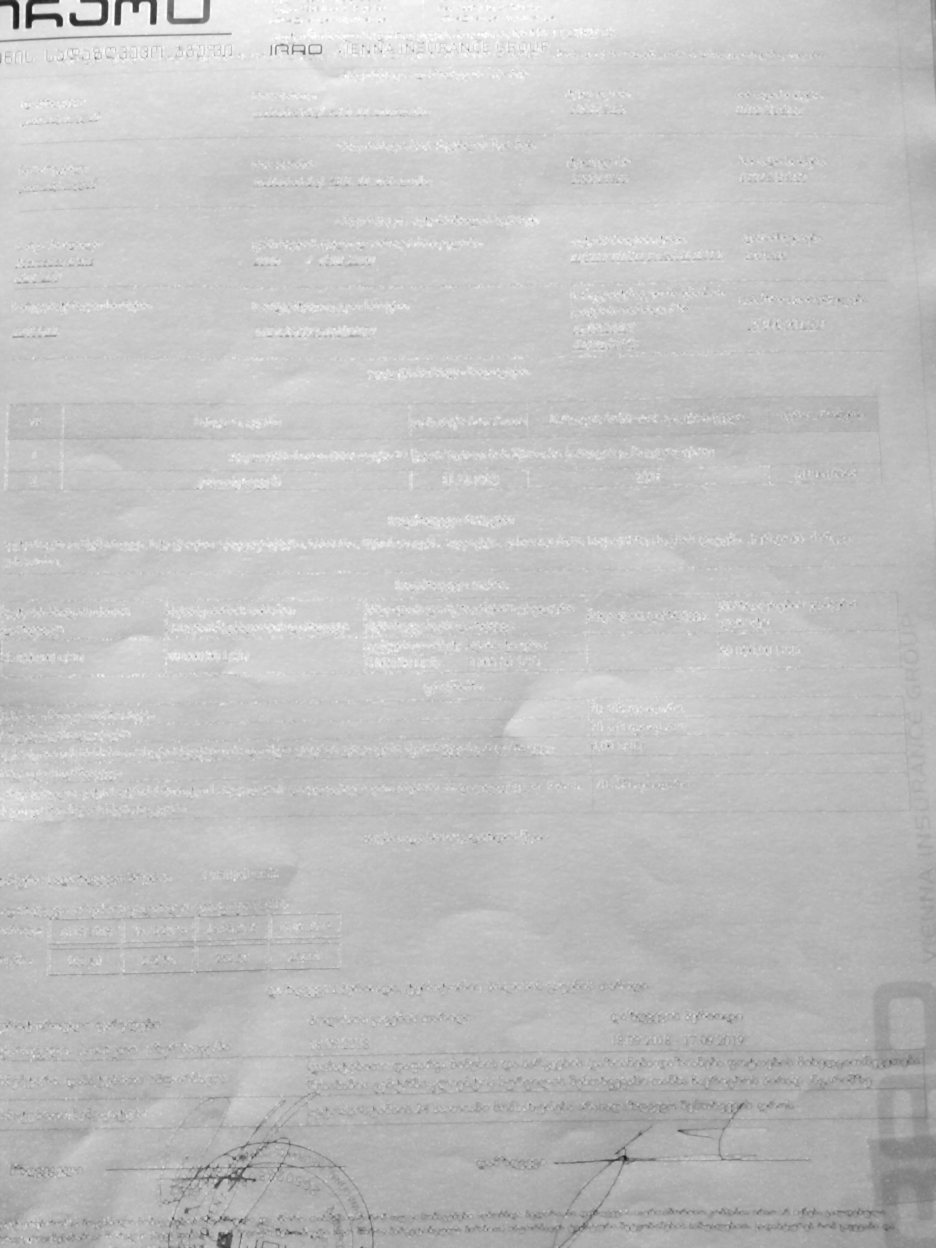
after this line I get this result

bg_img = cv2.medianBlur(dilated_img, 21)
I apply blur and get result like this

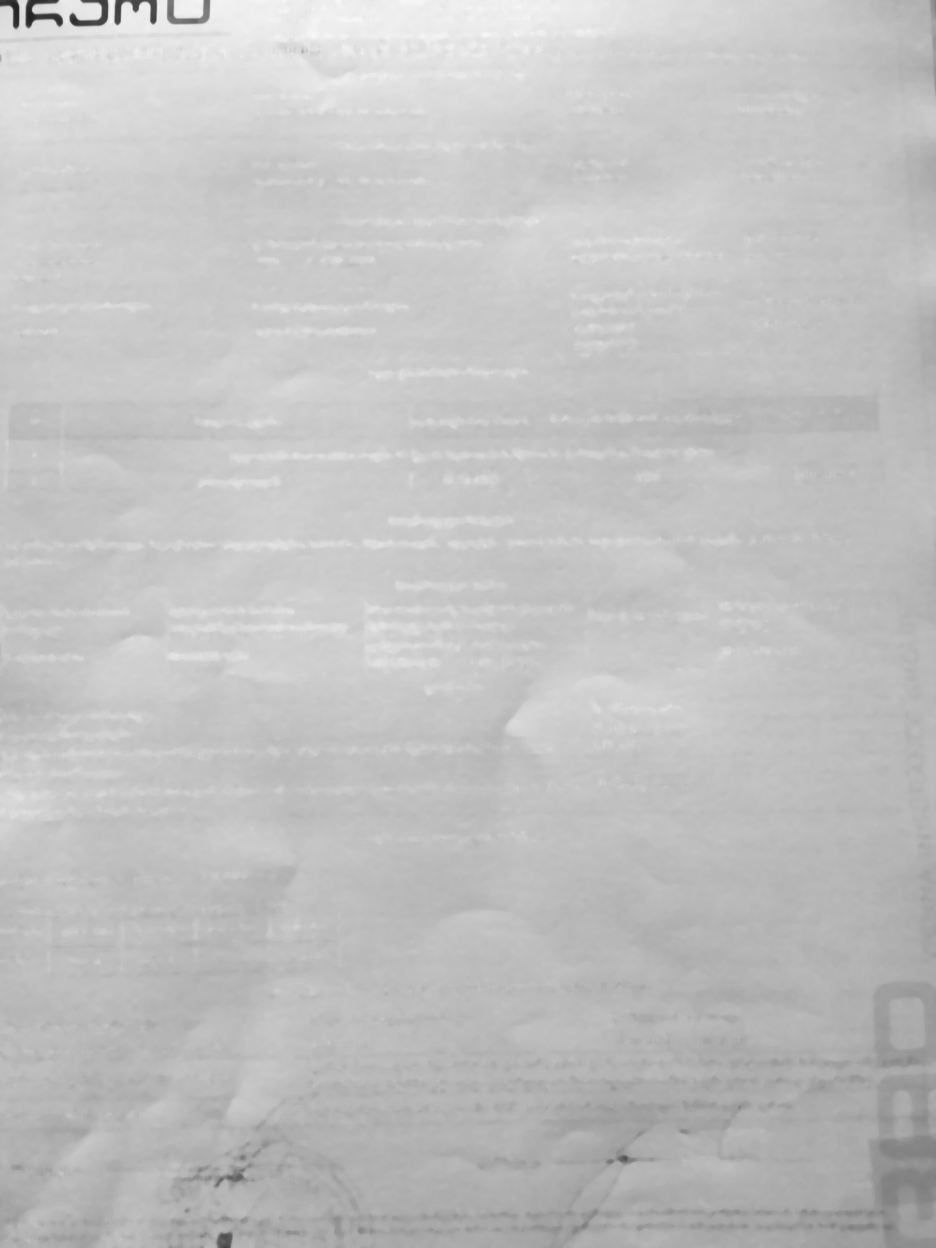
diff_img = 255 - cv2.absdiff(img, bg_img)
Then I take difference and get this result

norm_img = diff_img.copy() # Needed for 3.x compatibility
cv2.normalize(diff_img, norm_img, alpha=0, beta=255, norm_type=cv2.NORM_MINMAX, dtype=cv2.CV_8UC1)
_, thr_img = cv2.threshold(norm_img, 230, 0, cv2.THRESH_TRUNC)
cv2.normalize(thr_img, thr_img, alpha=0, beta=255, norm_type=cv2.NORM_MINMAX, dtype=cv2.CV_8UC1)
After normalization I get this, final, result

When comparing original image and the result you can clearly see that at the upper left corner from the text/logo only it's edges were left. How can I tweak my code so that that logo remains filled?