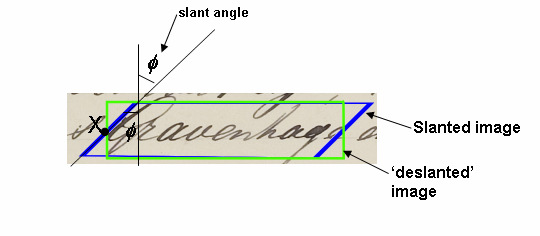
regarding to the theory that @StevenPuttermans posted through the stackoverflow website here is a code example, without using any predefined function from opencv but by accessing raw pixel values:
#include <iostream>
#include <string>
#include <opencv2/core/core.hpp>
#include <opencv2/highgui/highgui.hpp>
#include <opencv2/imgproc/imgproc.hpp>
#include <math.h>
#include <vector>

using namespace std;
using namespace cv;

int main()
{
  Mat src = imread("baboon.jpg", 0);

  if(src.empty())
    cerr << "Error: Loading image" << endl;

  int r1, c1; // tranformed point
  int rows, cols; // original image rows and columns
  rows = src.rows;
  cols = src.cols;

  float Bx = 0.5; // amount of shearing in x-axis
  float By = 0; // amount of shearing in y-axis

  int maxXOffset = abs(cols * Bx);
  int maxYOffset = abs(rows * By);

  Mat out = Mat::ones(src.rows+maxYOffset, src.cols+maxXOffset, src.type()); // create output image to be the same as the source

  for(int r = 0; r < out.rows; r++) // loop through the image
    {
      for(int c = 0; c < out.cols; c++)
        {
          r1 = r + c * By - maxYOffset; // map old point to new
          c1 = r * Bx + c - maxXOffset;

          if(r1 >= 0 && r1 <= rows && c1 >= 0 && c1 <= cols) // check if the point is within the boundaries
            {
              out.at<uchar>(r, c) = src.at<uchar>(r1, c1); // set value
            }

        }
    }

  namedWindow("Source image", CV_WINDOW_AUTOSIZE);
  namedWindow("Rotated image", CV_WINDOW_AUTOSIZE);
  imshow("Source image", src);
  imshow("Rotated image", out);

  waitKey(0);

  return 0;
}


This stackoverflow topic covers all the basics that you need for shearing.