This forum is disabled, please visit https://forum.opencv.org
| | 1 | initial version |
Use below command to build binary from your source file directory.
g++ -I/usr/local/include/opencv -I/usr/local/include/opencv2 -L/usr/local/lib/ -g -o binary main.cpp -lopencv_core -lopencv_imgproc -lopencv_highgui -lopencv_ml -lopencv_video -lopencv_features2d -lopencv_calib3d -lopencv_objdetect -lopencv_contrib -lopencv_legacy -lopencv_stitching
where
binary -> The binary file to be created.
main.cpp -> Source file.
Note: Instead for running all these command every time, just create a file named build.sh , put the above command to it and change the file permission to executable by running chmod 777 build.sh, and from next time run this file instead of running the whole command.
See OpenCV Documentation about OpenCV with gcc and CMake
See OpenCV Documentation about OpenCV with Eclipse (plugin CDT)
Open CodeBlocks and create new C++ project.
Now right click on your project->Buid Options.
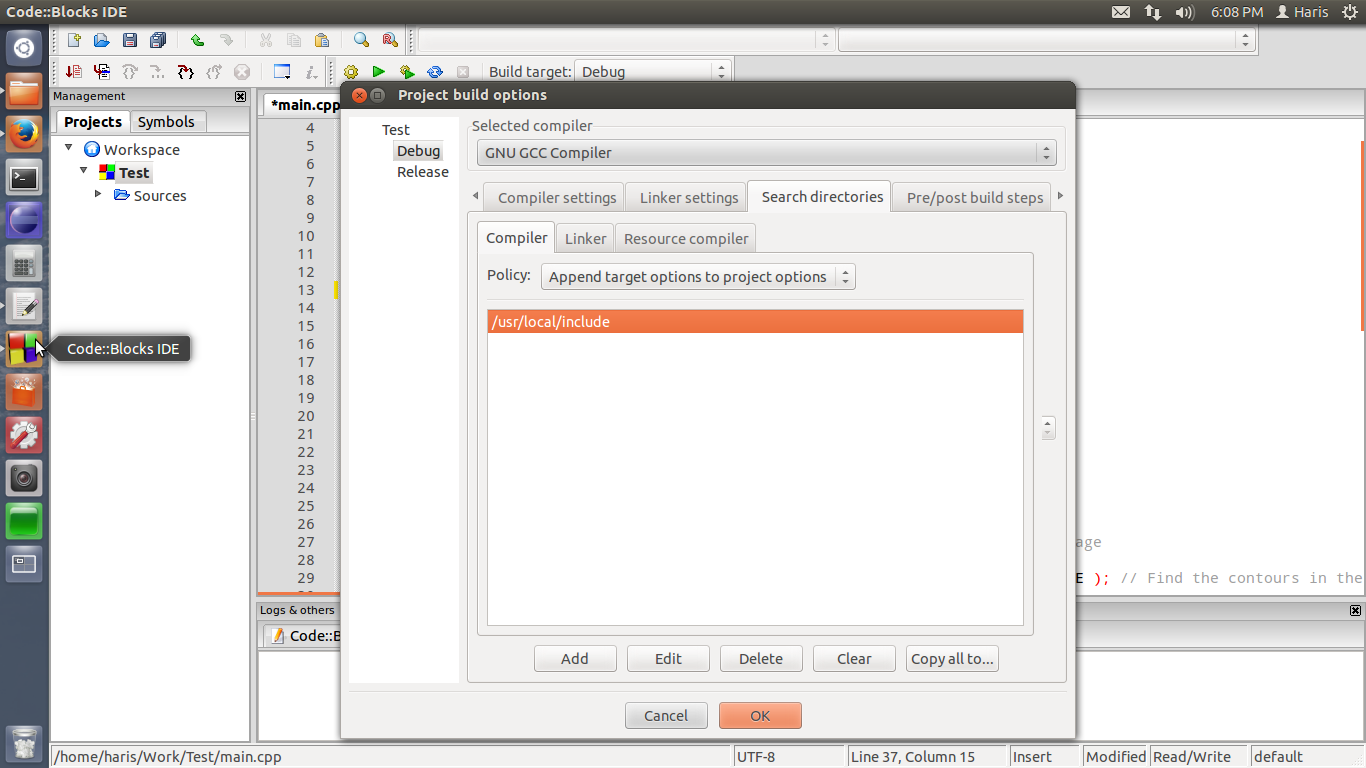
On the po-up window select Search directories tab
-> In that select Compiler tab and add OpenCV include directory, usually /usr/local/include
Screen shot:-
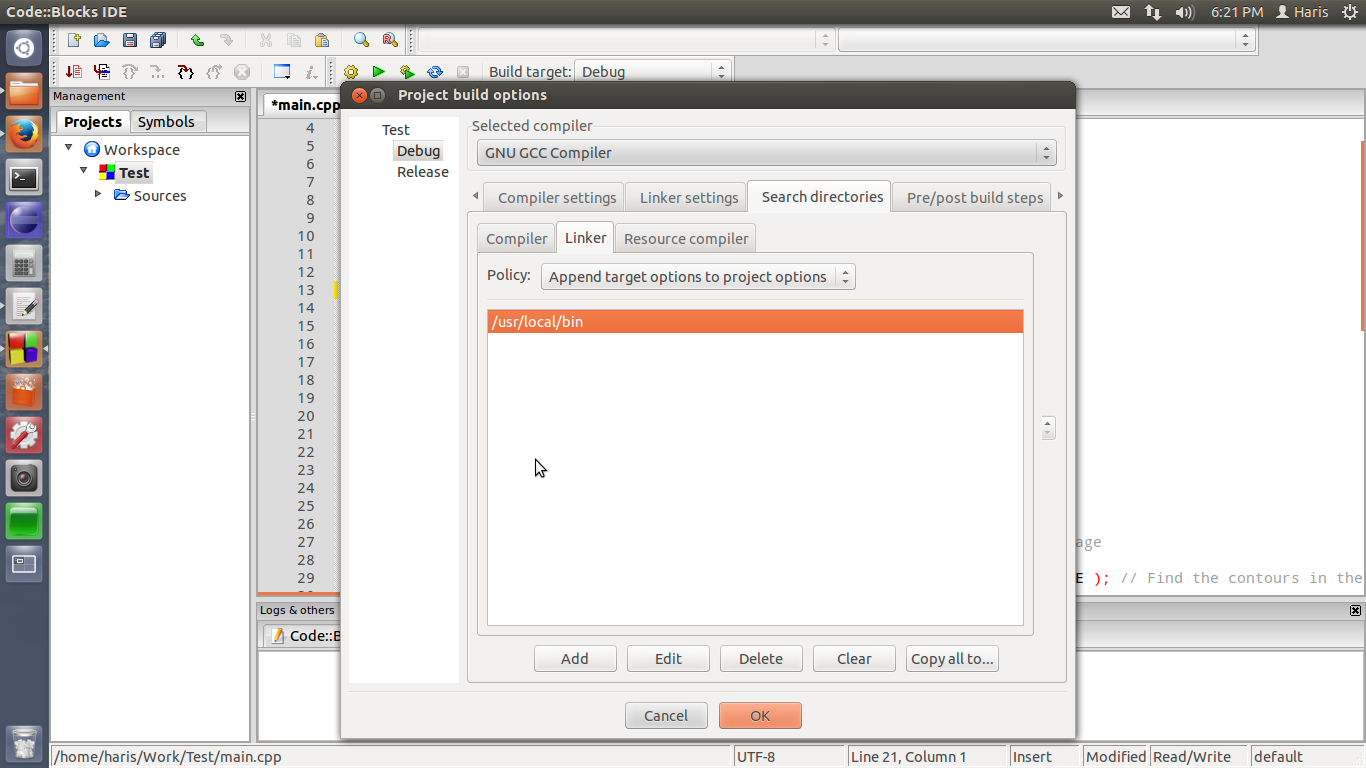
-> Now open Linker tab and set OpenCV bin directory, usually /usr/local/bin
Screen shot:-
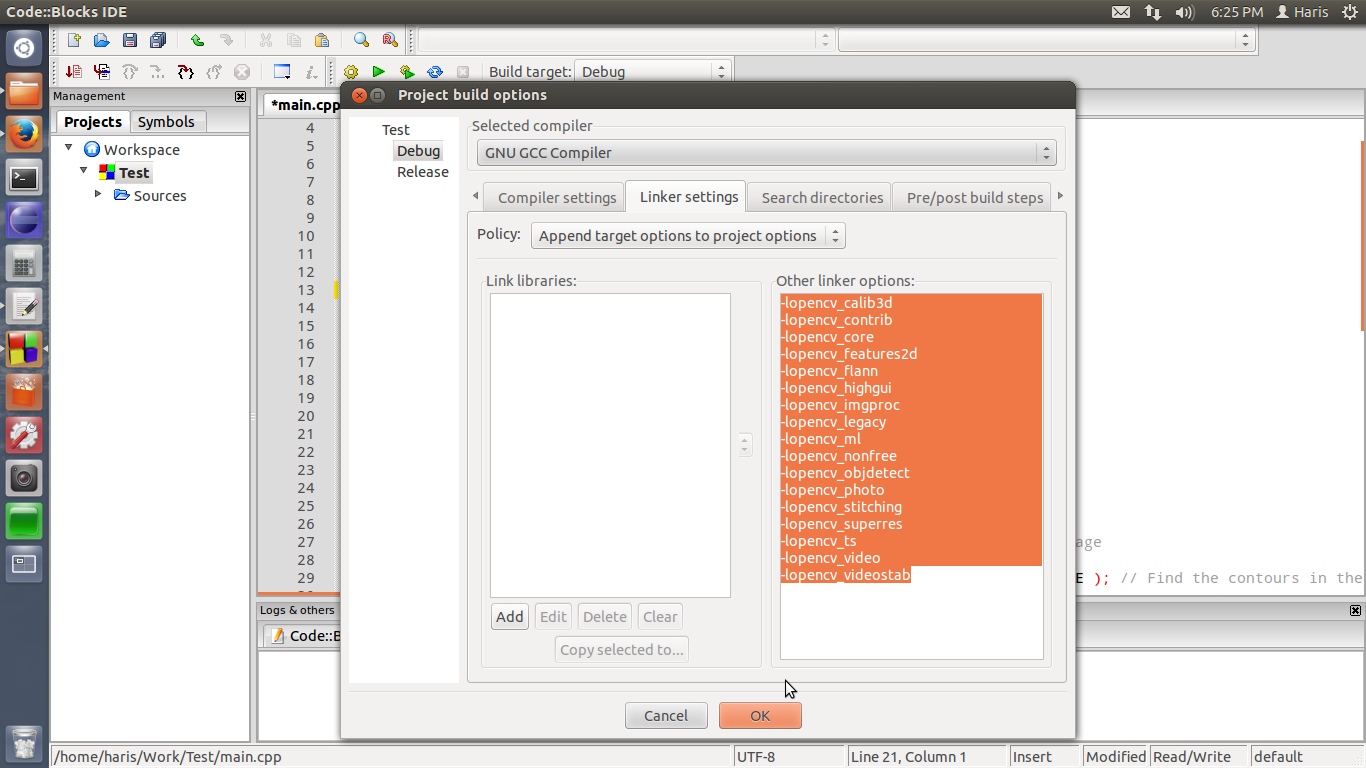
4.Finally Open Linker setting tab and on Other linker options add below libraries
-lopencv_calib3d
-lopencv_contrib
-lopencv_core
-lopencv_features2d
-lopencv_flann
-lopencv_highgui
-lopencv_imgproc
-lopencv_legacy
-lopencv_ml
-lopencv_nonfree
-lopencv_objdetect
-lopencv_photo
-lopencv_stitching
-lopencv_superres
-lopencv_ts
-lopencv_video
-lopencv_videostab
Screen shot:-
Done !
Now click ok and build your project.
