This forum is disabled, please visit https://forum.opencv.org
| 2019-08-28 01:15:41 -0600 | received badge | ● Popular Question (source) |
| 2017-02-18 16:03:16 -0600 | received badge | ● Famous Question (source) |
| 2016-04-12 16:02:59 -0600 | received badge | ● Notable Question (source) |
| 2015-12-01 04:01:44 -0600 | received badge | ● Popular Question (source) |
| 2015-03-16 04:56:39 -0600 | received badge | ● Good Question (source) |
| 2015-03-16 04:13:58 -0600 | commented question | How to use a custom SVM with HOGDescriptor, in Python Added the import — crd319 was right, thanks for telling quicker than me :-). @crd319: What exactly happens with those svm vectors in the depths of HOG.detectMultiScale is a big mytho for me too — i fear i can not be of much help. A few things i would check is the strides, meanShift can get funky results too. Also, i had „glitches” with too small scales happening where i’d always get full-frame BBoxes. But … all of those i didn’t understand why. Sorry! |
| 2015-03-03 19:00:09 -0600 | received badge | ● Nice Question (source) |
| 2015-03-03 07:30:24 -0600 | asked a question | How to use a custom SVM with HOGDescriptor, in Python Hi, this is a bit against the Idea here, but as its a topic i struggeled quite a bit, i’ll post it here anyways. The problem is using a custom SVM in HOGDescriptor.detect[MultiScale]. Now, HOGDescriptor wants a float numpy array with mystery content for setSVMDetector(…). As to what the mystery-content is, we can look at the source: https://github.com/Itseez/opencv/blob... Now the problem is how to get the list of SVs and rho — while CvSVM seems to have facilities for this, they’re not exposed to Python. This is where a dirty but working hack comes in: Saving the SVM to XML, then parsing that file to get the parameters. Something like: And for using it: this seems to work for me — so if anyone ever needs a custom SVM for HOG in OpenCV-Python without touching C++, i hope you can find this post! Best Regards, hope this helps! Dario Ernst |
| 2015-02-18 05:16:32 -0600 | commented answer | HoughLinesP vastly different in Python and C++ Hi, this now works as expected for me. I was rather dumb to overlook that parameter. Thats what you get for intense Cargo-Culting! Thanks a lot! |
| 2015-02-18 03:17:02 -0600 | received badge | ● Scholar (source) |
| 2015-02-17 09:51:02 -0600 | received badge | ● Nice Question (source) |
| 2015-02-17 09:13:56 -0600 | received badge | ● Editor (source) |
| 2015-02-17 07:39:38 -0600 | received badge | ● Student (source) |
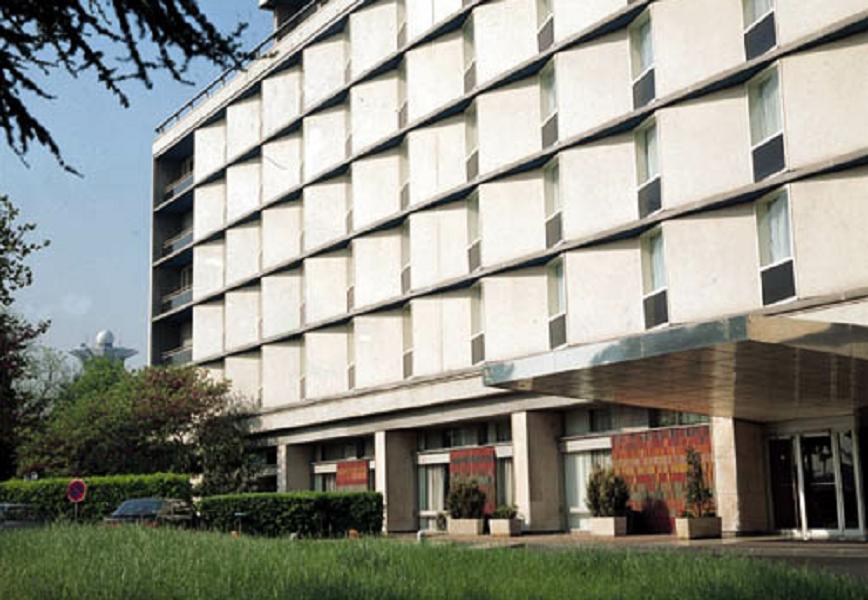
| 2015-02-17 07:37:14 -0600 | asked a question | HoughLinesP vastly different in Python and C++ Hi all, I’ve spent some time to debug a pole detector i wanted to build on basis of the probabilistic line transform. The results i got from my python code, using Opencv 2.4.x as well as 3.0.0-beta, always looked just so bad. So i made what i hope to be a kind of self-contained example… PythonC++ResultsI’ve taken the example image from the OpenCV docs for HoughLinesP, as this looked to me like a good tasting ground… Input Image
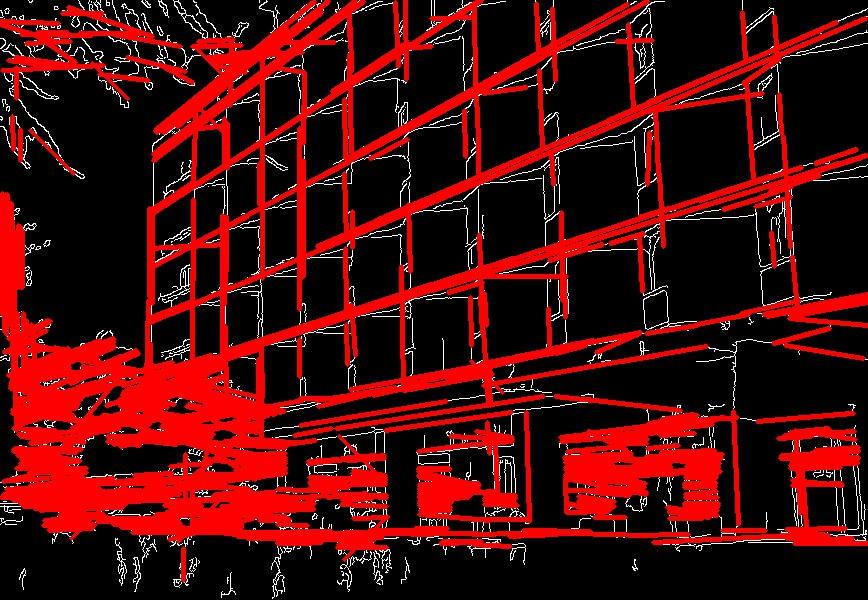
C++ Result 2.4.9+3.0.0-beta (expected)
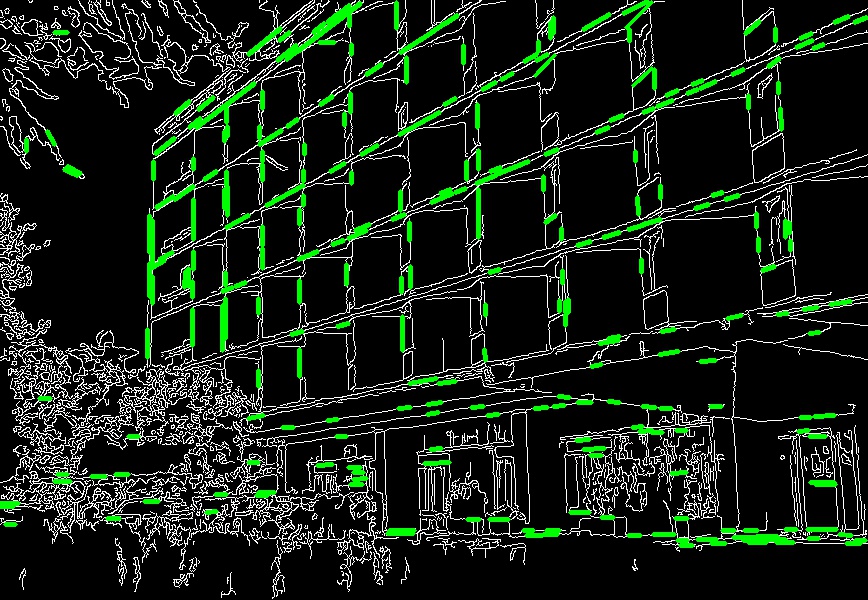
Python 2.7.9 OpenCV 2.4.9 (broken?)
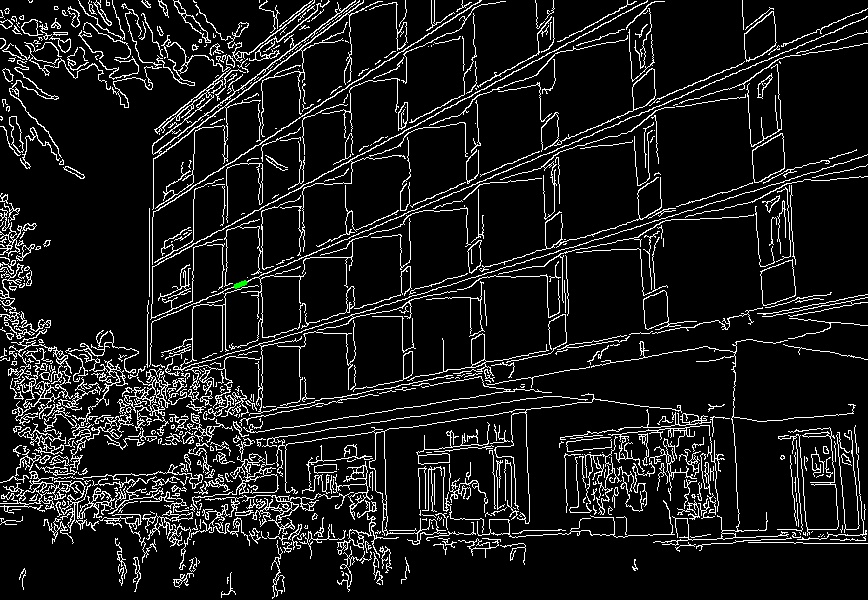
Python 2.7.9 OpenCV 3.0.0-beta (totally broken?)
As you can see, in Python with OpenCV 2.4.9 (3.0.0-beta looks worse!), the resulting lines are more, shorter, generally more clutter-y as compared with the C++ version. I’ve also checked the Canny output (visually), and it looks like it’s the same. Did i make any mistake? If not, how can this happen? I thought that python bindings are generated using an automated wrapper generator (swig?), so the code run in the background should be the same, right? Any hints or tips on this would be greatly appreciated! |