Ask Your Question
10

Questions regarding the "How to contribute a tutorial/code or a bugfix to OpenCV source code" guide

asked 2015-01-20 15:45:13 -0600

theodore gravatar image

updated 2015-02-24 13:24:22 -0600

I would like to contribute to the opecv community by adding some tutorials. The first thing that I did was to have a look at the guidelines here. However, reading the guide I would like to clear up some things on my mind, I guess more will raise up on the way.

My first question is:

Do I need to fork and afterwards clone localy the source code of opencv from github? and then when I finish make a pull request?

edit retag flag offensive close merge delete

Comments

1

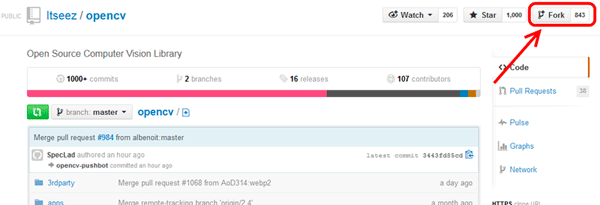
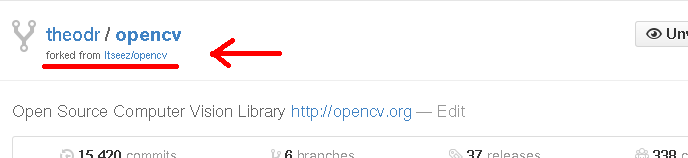
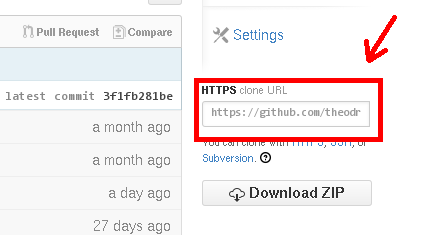
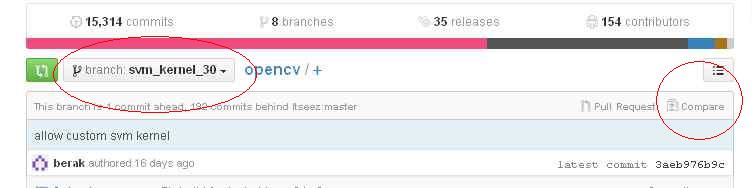
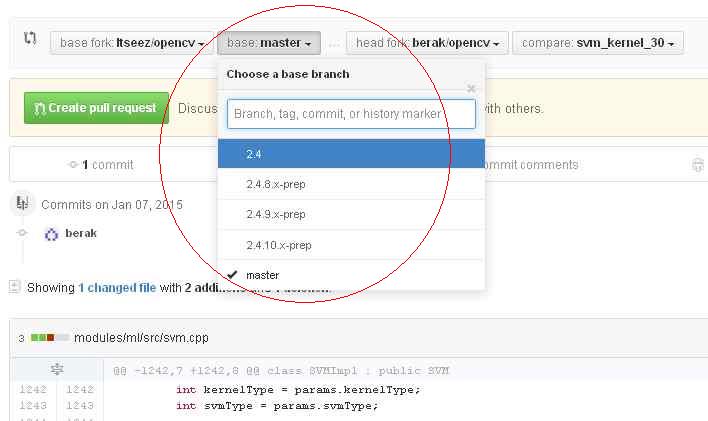
very much likely: yes so, (there's no difference between code or doc contributions)

have a look here , too

berak gravatar imageberak ( 2015-01-20 15:54:21 -0600 )edit
1

+1 +1 +1 +1 +1 +1 for all your work! Thank you man!

StevenPuttemans gravatar imageStevenPuttemans ( 2015-01-23 08:00:19 -0600 )edit

@StevenPuttemans or anyone who knows I would like to ask in case that I have implemented some functions which I use for my own development and I think that would be nice to be added to the official opencv library, what is the procedure to be followed?

Do I just add the functions and the documentation of them in the source code from the mainstream opencv's repo master branch from github, make a pull request and I am waiting for approval or not?

Should instead contribute them first in the opencv-contrib's repo master branch and wait to be added in the mainstream source code when the devs would think so?

or something else?

I would be grateful to be enlightened. ;-)

theodore gravatar imagetheodore ( 2015-02-20 05:27:43 -0600 )edit

@theodore, well the steps to follow are pretty straightforward

  1. Make a PR to a contrib module, a new module for completely new stuff, part of an xmodule if it extends functionality (if it doesnt exist yet, create it nevertheless, but for naming this is important)
  2. Add the correct documentation to the header files, so that documentation does not lack behind
  3. Make a sample illustrating how the code works and what it does
  4. Make regression tests - and this is the step for me that is still very unclear, but people will help you there
StevenPuttemans gravatar imageStevenPuttemans ( 2015-02-20 05:54:28 -0600 )edit

@StevenPuttemans by contrib module do you mean one of these?

theodore gravatar imagetheodore ( 2015-02-20 06:11:34 -0600 )edit

@theodore ofcourse!

StevenPuttemans gravatar imageStevenPuttemans ( 2015-02-20 06:38:07 -0600 )edit
1

@StevenPuttemans nice thanks ;-)

theodore gravatar imagetheodore ( 2015-02-20 07:25:00 -0600 )edit

1 answer

Sort by » oldest newest most voted
9

answered 2015-01-22 15:18:19 -0600

theodore gravatar image

updated 2015-02-24 13:19:19 -0600

In addition to this question since I had to work with git, with which I was not familiar (I guess I still need to learn some stuff) I decided to create a guide about the aspects of opencv/git/contribution similar to this one from StevenPuttemans.

As a linux user myself this guide is addressed basically to linux users, since the one from Steven I think is more than complete for the WIndows users.

Let's start:

OpenCV Contribution Guide in Linux Environment

Prerequisites

  • Linux (Arch Linux) x64 bit operating system
  • Git (git-2.2.2-1)

Setting Up

  1. Register at Github
  2. Install Git
    • pacman -S git (Arch Linux)
    • sudo apt-get install git (Ubuntu)

Forking OpenCV repository

  1. Go to GitHub
  2. Login to your account using your Github username and password
  3. Open the Itseez OpenCV GitHub page
  4. Press the fork icon on the right hand top side of the page which will help you to make a personal copy of the OpenCV sourcecode:

    image description

    When you are done return back to your own github page where you should find the copied repository:

    image description

    This means that you successfully forked the OpenCV repository to your personal account. We are ready now to clone the forked repository to our local environment, where will make the actual changes to the source code.

Cloning the forked OpenCV repository on your local machine

  1. Go to your local desktop environment and open your favourite terminal emulator. (I consider that you know what a terminal is and how to execute commands on the command prompt.) Browse to the path/folder where you want to sync up the OpenCV source code from your fork. In my case I decided to locate it into the /home/theodore/documents/git folder.

    image description

  2. We are ready now to clone the forked repository in our GitHub account to the current folder. Just type:

    git clone <link_to_your_forked_repository_in_your_GitHub_account> <name>

    you will find the link on your account in GitHub right here:

    image description

    and for the name just choose something that you like and correlates that you have the source code of OpenCV library. I chose opencv_source.

    image description

    If everything went right, you should end up with something like this:

    image description

Git Configuration

  1. Before we start making any changes into the source code let's configure some global git attributes. Every commit you make will have your name and email address to identify the ‘owner’ of the commit, so you should start by giving it those values. To do so, go into the source folder:

    image description

    and run these commands:

    git config --global user.name "Your Name"

    git config --global user.email "[email protected]"

    image description

  2. Install the default pre-commit hook by renaming opencv_source/.git/hooks/pre-commit.sample to opencv_source/.git/hooks/pre-commit - this will prevent you from committing whitespace errors.

    image description

Making actual changes to the sourcecode

  1. First let's see how is the status of our local repository and in which branch we are. We can achieve that by giving:

    git status

    git branch

    git branch -a

    image description

    We see at the moment that the master ...

(more)
edit flag offensive delete link more

Comments

2

At some point I will return to this, regarding some questions that I have and might be a good idea to be added to the guide. I hope more experienced git linux users will be able to help.

Moreover, if anyone finds any mistake, or things that should be added or changed just feel free to tell me. I think now I will take some rest :p.

theodore gravatar imagetheodore ( 2015-01-22 15:23:44 -0600 )edit
1

++++++++++

berak gravatar imageberak ( 2015-01-22 15:25:46 -0600 )edit

ok, let's start with my questions. My first question is when you are done with the branch that you have created, either your pull request got accepted successfully or for any reason you decided that you do not want to work with it anymore. What is the usual action? Do you merge it locally with the branch that is derived from (e.g. let's say master or 2.4) then delete the branch and push the changes to Github, or something else?

theodore gravatar imagetheodore ( 2015-01-23 06:33:09 -0600 )edit
2

hmm, let's say, the 'making changes' part needs some additions:

  • do not make any changes to the master branch, keep that clean, instead:
  • make a new branch for you changes, and switch to that: git checkout -b mybugfix
  • apply you fix
  • commit: git commit -a -m "explain what you fixed here"
  • upload that branch to github: git push origin mybugfix
  • check if it looks good. go to your github account, select the branch with your bugfix, and push the 'compare' button image description
  • once you arrive at the compare page, select the desired target branch (2.4 or master) image description
  • make a last check. one commit only ? no files touched other than you wanted ?
  • take a deep breath, and push the green button ;)
berak gravatar imageberak ( 2015-01-23 06:52:24 -0600 )edit
2
  • if your pr got accepted, a button to delete that branch will appear at the end of the pr comments (you don't need that anymore, it's part of the official repo). you can delete your local branch, too:

    1. switch back to original branch: git checkout master (or 2.4)
    2. delete your bugfix: git branch -D mybugfix
  • same applies, if it got rejected.

  • to update(merge) your local repo, just do a git pull upstream master (or 2.4)

(i know you had some section about remotes yesterday, can't see them now)

berak gravatar imageberak ( 2015-01-23 07:05:33 -0600 )edit

@AlexanderShishkov - could this guide be added to the contribute page?

StevenPuttemans gravatar imageStevenPuttemans ( 2015-01-23 07:47:37 -0600 )edit

Meh not working -_- will mail him!

StevenPuttemans gravatar imageStevenPuttemans ( 2015-01-23 07:49:00 -0600 )edit
1

@berak the additions that you propose, I think are covered on the Opening a Pull Request section. As for the remotes do you mean the part on the Keeping your Fork Up-to-Date number 1.

as for the delete button do you mean the Close pull request button?

theodore gravatar imagetheodore ( 2015-01-23 07:49:53 -0600 )edit

^^ yes, you're right.

as for the delete button do you mean the Close pull request button?

no. the 'Close pull request button' will change the pr status from 'open' to 'closed' (it will not delete anything)

there will be something like : "you can delete your branch now" at the bottom of the conversation (can't show you one now, unfortunately, also, i think, it's not that important at all)

berak gravatar imageberak ( 2015-01-23 07:55:06 -0600 )edit
1

@berak, not working since there is a user with the name Alexander also. I am wondering if there is a way of grabbing both parts of a username!

StevenPuttemans gravatar imageStevenPuttemans ( 2015-01-23 08:02:28 -0600 )edit

Question Tools

2 followers

Stats

Asked: 2015-01-20 15:45:13 -0600

Seen: 2,152 times

Last updated: Feb 24 '15